Scanning Items
Steps to use Warehouse mode on a Windows scanner.
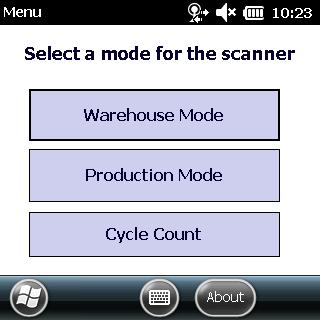
First, you should log into the scanner application and select Warehouse Mode from the main menu.


Adding a container to the scanner
Once you are logged in and have selected Warehouse mode a screen will show allowing you to scan a batches container. Scanning a batch sticker for a container will automatically add it to your scanner and will prevent others from being able to add this container to their scanner. Scanned containers show in a list on the screen allowing you to see the current items that you have scanned.
To remove an item:
- Click on the container you wish to delete with pen in the bottom of your scanner.
- Click the options button in the lower right corner of the screen.
- Select remove item from the menu that shows.


Adding container from a weighing location
Certain locations that have been marked as a weighing location will cause the scanner to alert the user that the amount in the container may have changed. The scanner user then needs to confirm the amount that is in the container. If a discrepancy is found the scanner user can select then enter the correct amount for the container. Doing so will result in a container exception showing the change.


Transferring containers to a location
To transfer containers to a location scan a location bar code at any time when you are in Warehouse mode. The scanner will then ask you if you want to move the scanners items to the location you have scanned. If you want to move the items click yes or no to cancel.
Once you have clicked yes a window will show listing all the containers that are scanned. You can move all containers or individual containers by clicking the select all checkbox or the individual containers checkboxes to only move certain containers. Once you have selected your containers press the move/confirm button. Pressing the move/confirm button will then move all the selected containers into the location you scanned. If you moved all the containers into a location the scanner will prompt you to add more containers. If you did not move all the containers a list will show with your remaining items.


Multiple Carts on a scanner
It is possible to have two different sets of containers on a scanner. Each time you scan a container it is added to a “cart” on the scanner. You can have more than one cart on a scanner. This can allow a warehouse person to gather a pallet of containers to move and scan the items but also have another pallet that they will move at a later time. By default, the scanner already creates a cart for you when you first scan a container.
To manage or change carts click on the options button on the bottom right corner of the screen. Select the Change Carts menu item. Clicking the Change Carts menu item will show a screen that lists the scanners current carts. From the Manage cart screen, you can add another cart r select a current cart by selecting the cart you want and pressing the choose button.


Common Questions
Q: When I scan a container it tells me that the container is already in my cart.
A: This message means that the container is already in another cart on your scanner. To change carts go to the options menu and change carts.
Q: I received a message telling me that the container I scanned is already assigned to another scanner.
A: This means that the container already belongs to another scanner. To move this item manually go to Administration -> Scanner Settings -> Manage Scanner Carts in Virtual Office. From here, you can view the carts currently assigned to scanners. If you need to change a cart from one scanner to another scanner select a different scanner and click save.
Q: I was using the scanner and my battery died or the scanner was broke. How do I move all the items in my cart to another scanner?
A: If your battery died simply charging the scanner will allow you to continue. If the scanner broke and you need to change scanners you can move the scanners cart to another scanner. To move a cart to another scanner manually, go to Administration -> Scanner Settings -> Manage Scanner Carts in Virtual Office. To change a cart from one scanner to another scanner select a different scanner and click save.


