
The grid displayed will list all available Inventory components in the system per the type that you are viewing. These entries can be sorted by clicking the column titles, using the search function or filtering by additional options. For more information on Grid Sorting click here. The action buttons listed across the top of the window, above the grid, are available for all Inventory Types. Pink colored rows in this grid indicate that the amount needed for BPR’s is greater than what is currently available in the system. Refer to columns on hand and on hold. All component rows that are highlighted pink can also be viewed in the Low Inventory Menu. For more information on Low Inventory click here.
Virtual Ops System Location/Navigation:
Inventory > Add/Edit Packaging > Select available component from dropdown
Grid Action Buttons
Add new – Select this action to add a new component to the system.
Edit – Select a components row on the grid and then select the Edit button.
View Orders – This action will display all available orders containing the selected component. More info on Orders
View Batches – This action will display all available batches for the selected component. More info Batches
View PO’s – This action will display all available PO’s containing the selected component. More info on PO’s
View BPR’s – This action will display all available BPR’s containing the selected component. More info on BRP’s
Print Barcode – Select this action to display and print the barcode for the selected component.
Column Visibility – By selecting this option you can change the visible columns per the grid you are on. These selections are saved per user/browser per grid.
Excel – Selecting this action will export the currently displayed grid data to excel.
There are several ways in which you can sort the grid in order to find specific results fast. If you know the name of the item you are searching for then using the Search Box will be your best bet (1). You can narrow or filter your search results by utilizing the “search by” dropdown (2). You can also sort grid results by clicking the Column Titles (3). In doing so you will change the sort results per the column from high to low; click again to sort the opposite. See example image below.

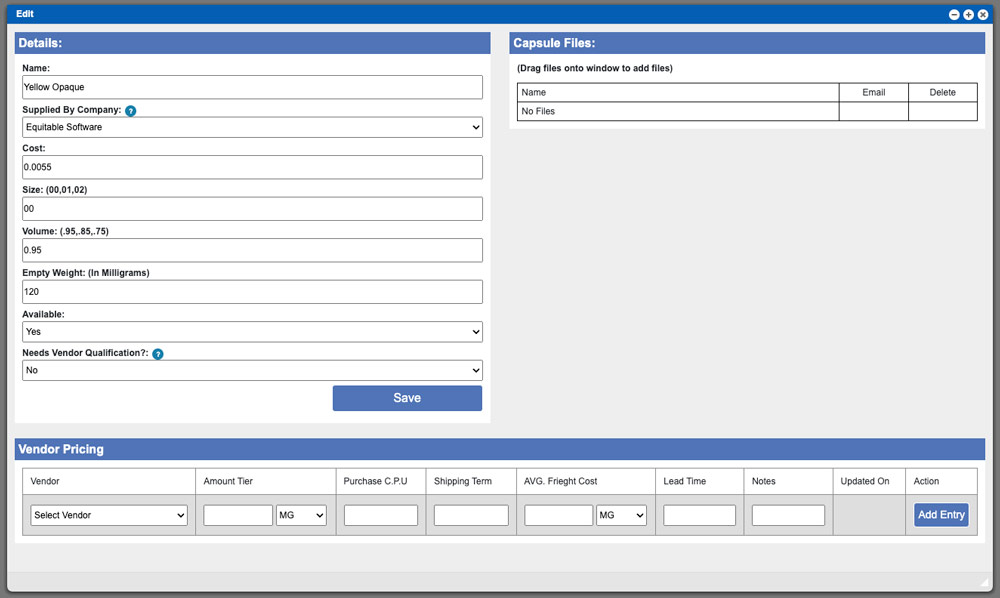
Adding and Editing Packaging
You will be able to choose a variety of components from the (Inventory->Add/Edit Packaging) menu including Capsules, Case Types, Containers, Cottons, Cut Bands, Desiccants, Inserts, Lids and Scoops. However, if you have requested custom needs for your unique manufacturing processes, these menu items may be different. Begin inputting the information into the details section on the left by filling in the empty data fields with the required information. Verify your information to be correct and then click the Save button to create the new packaging item. Please be aware that the available information inputs can differ depending on the component that you are adding or editing. Example image for this window can be seen below.
Label types (labels/master case labels/case labels) cannot be edited from the Inventory section. To learn more about editing Label types click here.
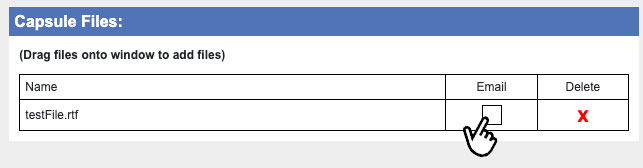
Files
You can add files to a component by using the files section located to the right of the Details block. Add files by dragging them onto the files section. Successfully added files will show up in the list. In the event you want to include the file when creating and sending (emailing) a PO (purchase order) make sure to click the email check box.
Vendor Pricing
The vendor pricing area, located at the bottom portion of the edit window, allows you to enter and record different vendor and vendor tiers of pricing for components/ingredients. This can be helpful when creating PO’s. For more information on PO’s (purchase orders and creation) click here.
