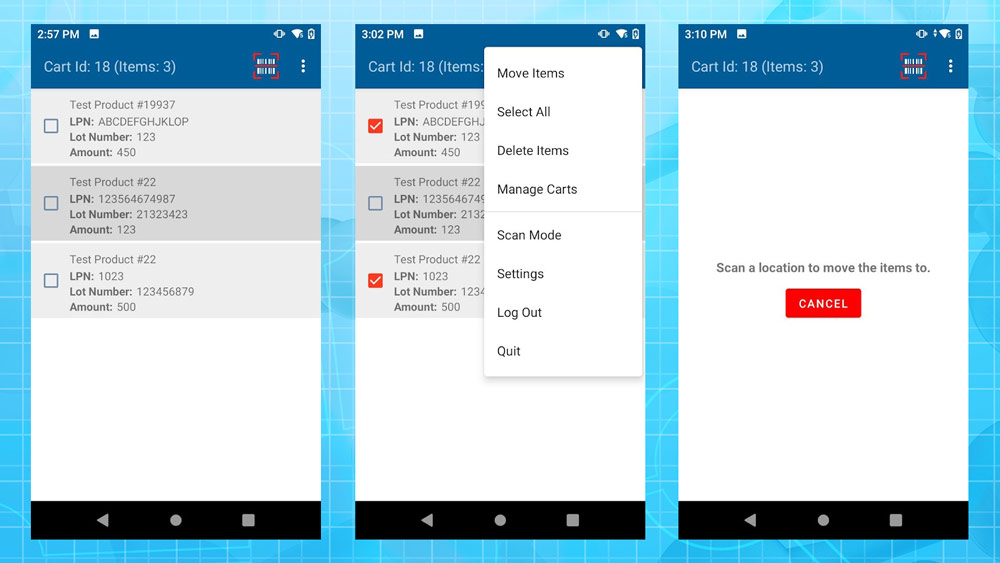
The Fulfillment Warehouse Scanner Mode is where you can move fulfillment pallets around the warehouse. The process starts by scanning some pallets that you are are wanting to move. After scanning, the pallets will be added to your screen in a list. This can be seen in the furthest left scanner screenshot in the image above. This is your current and default cart which will contain items from this scanning mode. For more information on managing carts and how to have multiple carts click here.
Selecting and Deleting Pallets
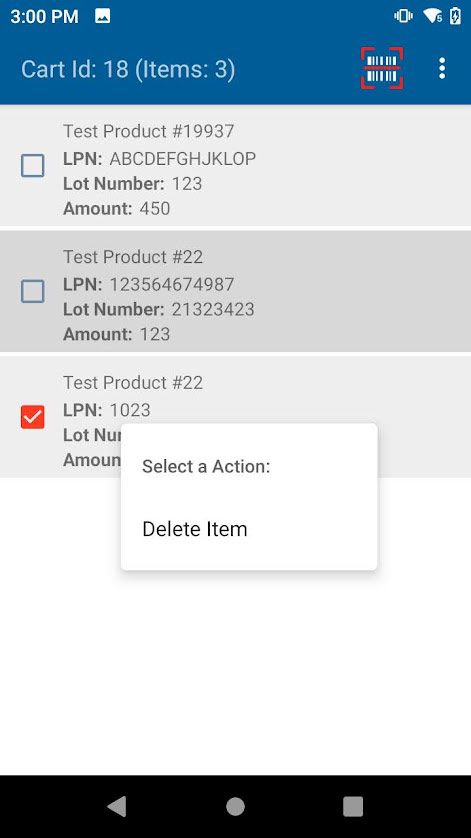
Once pallets have been scanned and added to the cart on the scanner you can begin the process of moving a pallet or deleting a pallet. You can move or delete specific pallets in your cart by selecting them first. This can be done by simply tapping the pallet list item on the screen. Your gesture will be confirmed by the now filled in check box that is on the left side of the row. You can un-select a pallet by performing the same gesture. If your cart list is large you can select all pallets in the list by accessing the menu in the top right (3 vertical dots). This can be seen in the middle scanner screenshot image located at the top of this page. You can also quickly remove a single list item by long tapping it. This will bring up a single action pop-up to allow quick removal of the pallet from the cart. If you need to learn more about gestures and menu access click here.
Moving Pallets
Moving a pallet from your cart is very close to the same process listed above. First you will need to select the pallets from the cart, with the most efficient method listed above, that you wish to move to a location. Then access the menu in the top right and select the Move Items option. This can be seen in the middle scanner screenshot image located at the top of this page. You will then be prompted to scan a location barcode to complete the action. This can be seen in the right most scanner screenshot image located at the top of this page. Upon scanning a location the selected pallets will be removed from the cart. You can continue this process until your cart is cleared of pallets that need to be moved.
Carts are only utilized in the Warehouse and Fulfillment Warehouse scanning modes. Carts are also specific to the scanning mode in which they are created in. i.e.: A cart created in Fulfillment Warehouse scan mode will not be accessible while in the Warehouse scan mode. You also have the ability to have multiple carts within either scanning modes. To manage or create new carts select the menu in the top right (3 vertical dots) and then select Manage Carts from the menu. This will display all carts assigned to scanner. At this point you can access any cart that is currently available or create a new one. To create a new cart tap the menu icon in the top right (3 vertical dots) and select Add New. This will add a new and empty cart to the list. These actions can be seen in the scanner screenshot images located below.
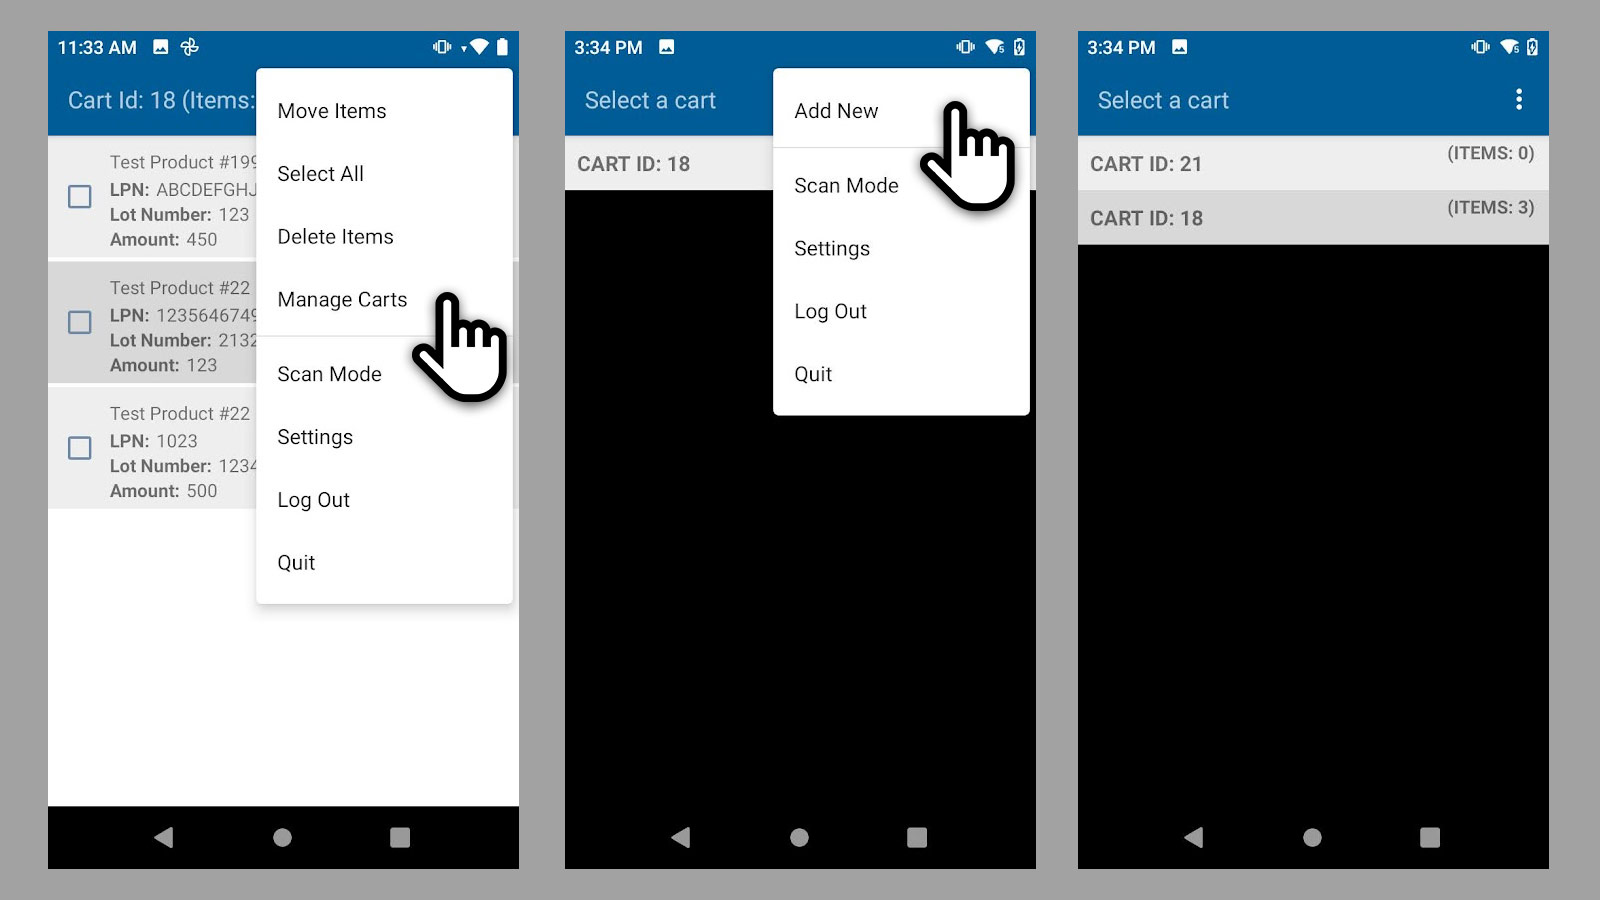
Switching to another cart or deleting a cart can only be accomplished in the Manage Carts section. Both of these options can be accomplished in the same manner. Simply tap a cart in the list to bring up a new action menu. The Select Cart option will make the current selection the active cart. Only active carts can receive scan items. To delete a cart tap the one you want to remove and then select the Delete Cart option from the action menu. See scanner screenshots below.