The Users section in the Administration menu drop down will allow those with proper permissions to manage users, create users, unlock users and user permissions within the system. Currently the Users menu contains two sections: Users and Permission Templates. Most of your User management will be completed within the Users section and this page will concentrate on that section.
Upon opening this section you will be displayed with a user grid. You can quickly sort the grid by using the Status drop down located in the top right, above the grid or by searching. For more information on grid sorting options please click here. Lets start with the first menu option, manage users.
Virtual Ops System Location/Navigation:
Administration > User Management > Users
Quick Links
Creating New User
Locked User Process
Permission Templates
Manage Users
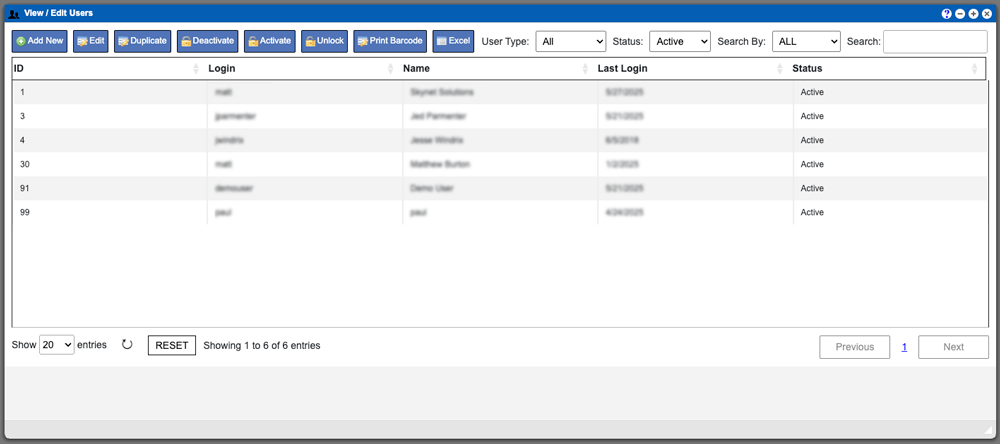
The manage users grid (seen above) will display all users currently in your system. You can quickly sort the grid by using the status drop down or by searching. For more information on grid sorting options please click here.
Most of the actions associated with the Users grid are self explanatory but I would like to cover a few of the more commonly used processes and functions associated with this process.
Grid Action Buttons
Add New – Select this action to create a new user for your system. Process is outlined below.
Edit – Select a user by clicking a row from the grid, then click this action to edit the user.
Duplicate – Select a user by clicking a row from the grid, then click this action to duplicate the user.
Deactivate – Select a user by clicking a row from the grid, then click this action to lock a user from accessing the system.
Unlock – Select a user by clicking a row from the grid, then click this action to unlock the user and allow them to log into the system. More info below
Failed Attempts – Select a user by clicking a row from the gird, then click this action to view a users failed login attempts data.
Print Barcode – Select a user by clicking the row from the grid, then click this action button to print the users login barcode.
Excel – Selecting this action will export the currently displayed grid data to excel.
Creating and editing a user in the Virtual Ops system is something that will be re-visited from time to time and is important to understand. The example image below (click to enlarge) displays the current user profile settings when creating a new user in the system. I will break this portion up into sections and explain in further detail below:
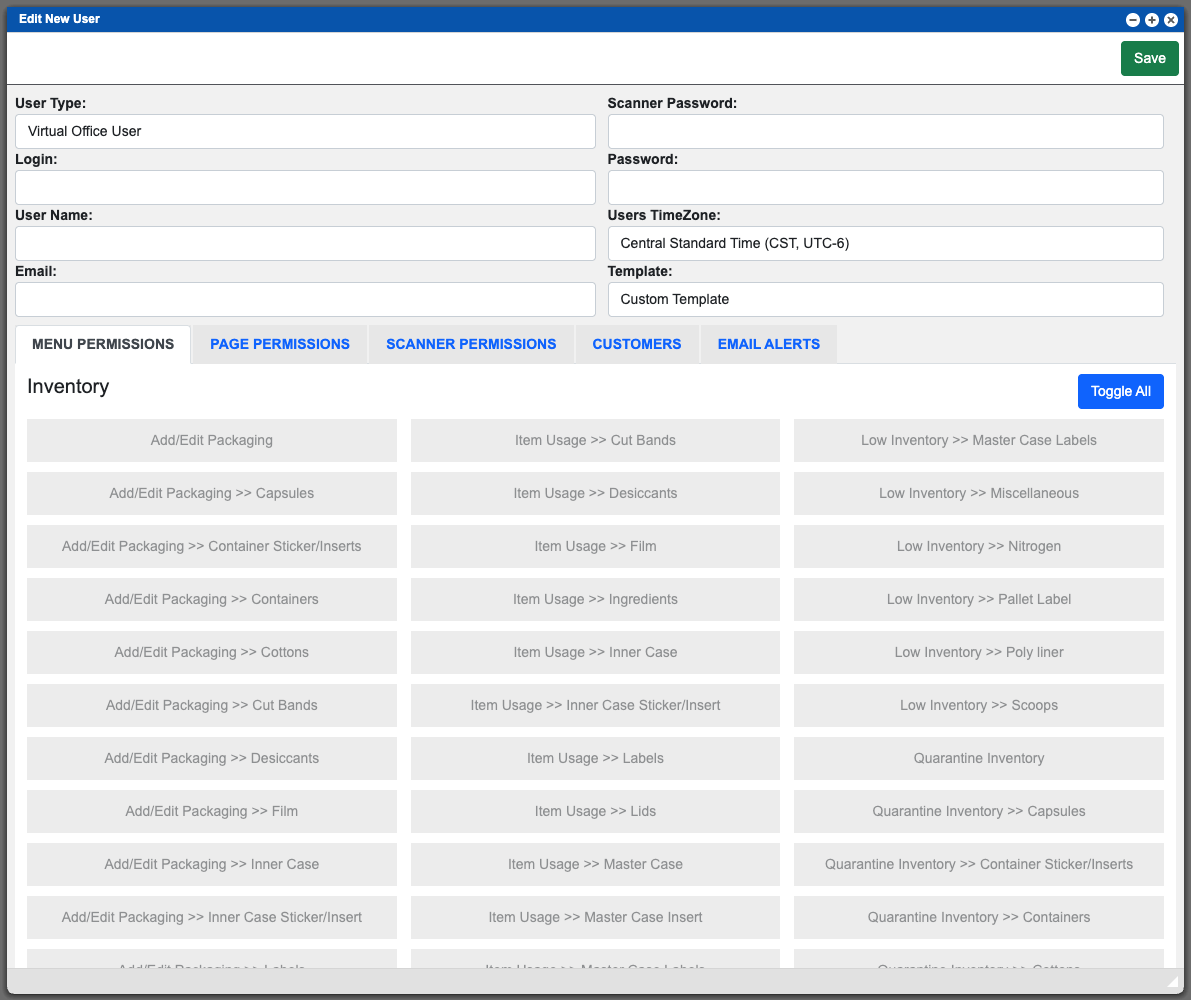
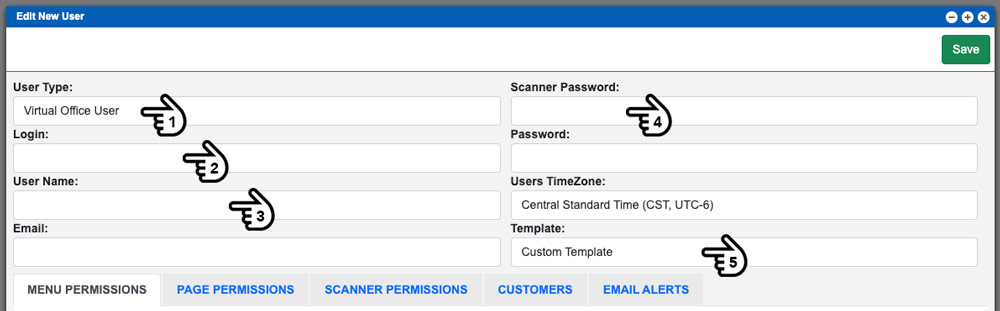
When creating a new user account in your system you will need to start with inputting information into the top portion of this user profile window. I will cover some of the basics. Refer to the example image below to match the indicator hands. Click image to enlarge. Starting with the User Type input (1), select the users system access. This will be: Virtual Ops User, Scanner User, or Virtual Ops & Scanner User. This will limit the users access to the system but this setting can be changed in the future. It is important to note that only users that can log into Virtual Ops count towards your user limit.
The User Name input (2) will be used as their system login name. The Users Full Name (3) will be used/displayed in the system when reviewing past events, logs or changes. The Scanner Password input (4) is only needed if the user is also a Scanner user; but even then, this password not required. Typically a Scanner user can log into their scanner by scanning their user barcode. However, this could potentially be a security issue. Entering in a password into the Scanner Password input (4) will then require an additional password to be inputed, therefore preventing other users from scanning your user barcode to get logged in. The Template drop down (5) requires that you have already created a Permission Template that can be applied to a user. More information on Permission Templates can be found below.
The bottom portion of the user profile window contains the user permissions. There are several tabs with individual sections within them. We will explain each of the permission section tabs below. It is important to note that additional sections within the “Page Permissions” tab may be needed in order to view all available options in a page in the VO system. The Permission Tabs (1) are located just under the main profile input boxes on a user screen.
In the example image below you can see that the active tab is “Menu Permissions” (1). The permission tabs will contain sections followed by list of permission items within each section. The sections are denoted by a title on the left and a blue “Toggle All” button on the right. The permission blocks can be clicked to enable or disable. In the example below we are in the Menu Permissions area and allowing the “Add/Edit Packaging >> Case Insert” (2) permission within the Inventory Menu section. The grayed out items (3) are examples of Inventory Menu items that are NOT allowed for this user account. See example image below, click to enlarge.

Menu Permissions Tab – Contains permissions to allow users to view and have access to specific menu items in Virtual Ops system.
Page Permissions Tab – Contains permissions to allow users to view specific pages, areas, or sections in the system that might not have a direct navigable path.
Scanner Permissions Tab – Contains permissions to allow scanner users to view and have access to specific menu items in Virtual Ops system.
Customer Permissions Tab – Contains permissions to allow users to view and have access to specific customer information within the Virtual Ops system.
Email Alerts Tab – User Email Events are email notifications that users can be subscribed to. Users will be notified via email when a specific event has occurred if their account has an active subscription.
Some of the permission tabs will house a lot of items that will need to be scrolled through. When setting up a new user, or editing an existing user you can click the “Toggle All” button to quickly turn on/off all permissions within a section.

If a user attempts to login unsuccessfully their account will be locked after 5 attempts. A user account that has been locked will display “Locked” in the status column for the user grid. A persons with proper permissions can unlock a users account by clicking the users row from the grid and then clicking on the “Unlock” action button located at the top the users grid. Performing this process will reset the users login attempts counter and will allow them to login into the system.
The Permission Templates are saved presets for page and menu permissions that can be applied to new and existing users. Creating templates can be great starting point for role specific jobs in your company. For instance, you could create a permissions template that contains preset permissions to users within your purchasing dept, sales, warehouse, administration and so forth. Once a Permission Template has been created it can be updated or edited within this same menu. You can apply permission templates to users via the Users grid and a users profile window. Once you are editing a user you can select a permission template from the dropdown within the “template” input box (5). View example image, with helping hand #5, above for this reference.
Virtual Ops System Location/Navigation:
Administration > User Management > Permission Templates
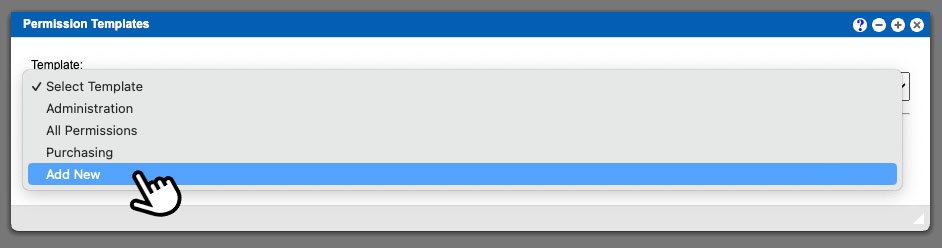
Once you are on the Permission Templates page you can begin this process by clicking the drop down. From this drop down you can select an existing template to modify or select “Add New” from the bottom of the list. See example image above. When creating a new Permission Template you will not see the drop down (1) listed in the example image below. That drop down is only present in saved/existing Permission Template and allows you to quickly navigate to another template for editing purposes.
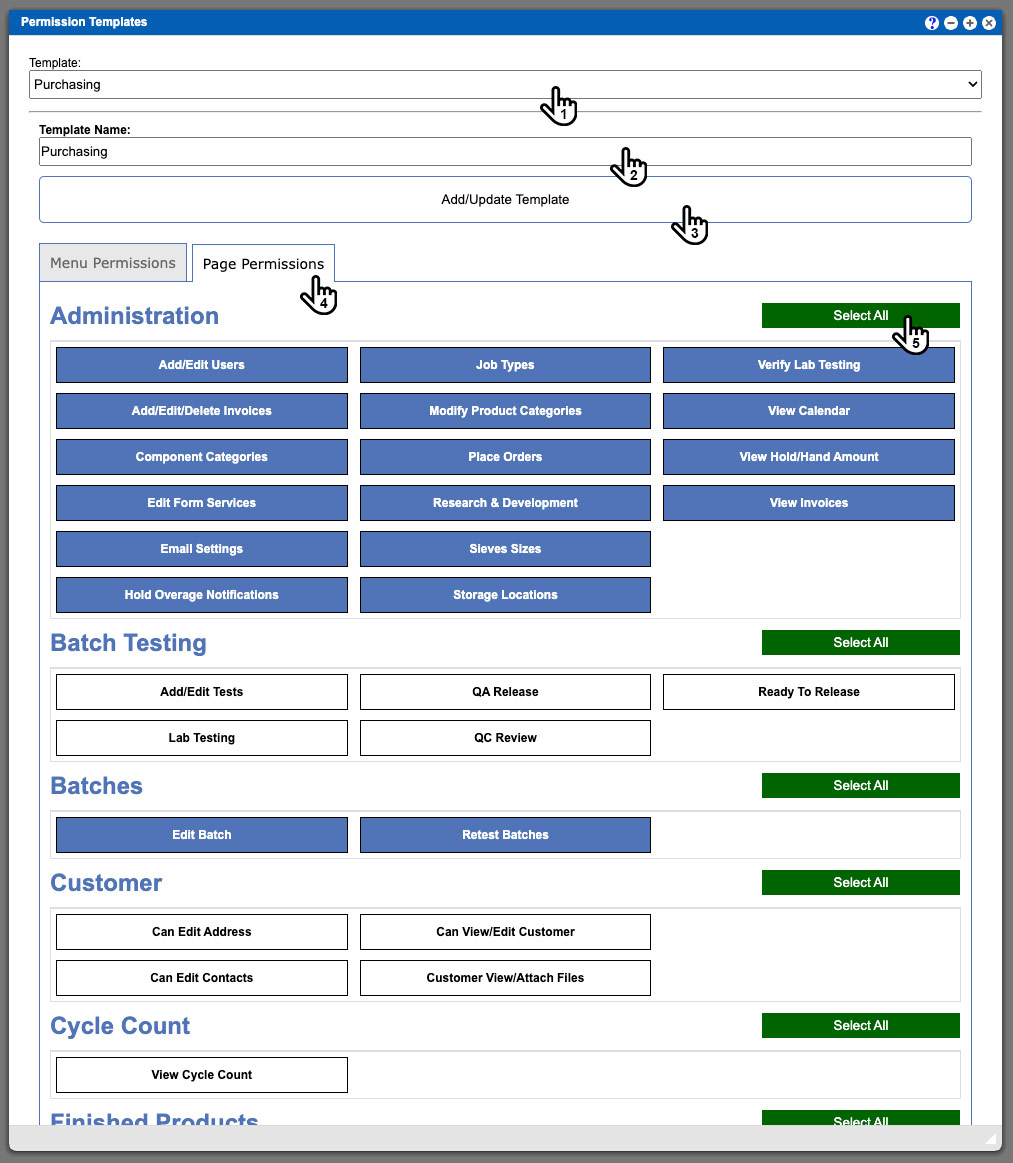
When creating a new Permission Template you will need to start with the Template Name (2). See example image above. Click the image to enlarge. Be aware of the save button (3) location and click to save your template progress. Much like the User profile window above this window also has Tabs to house each sections permission blocks. However, this time all of the sections are opened for display. There is a green “Select All” button (5) located at the top right of each section that will allow you to quickly select all of the permission blocks within that section. The functionality for the permission blocks are the same as seen above for the User profile window – a blue background equals an active permission and a white background equals an in-active permission.
