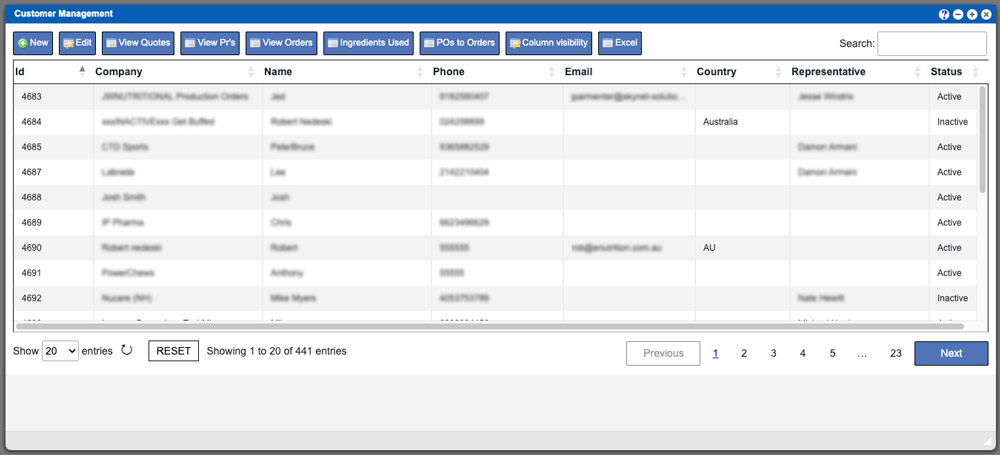
Customers, within your Virtual Ops system, refers to the entity or company that you are producing finished goods for. Formulas, quotes and finished goods are created for your customer(s). This help page will describe the process for adding and editing Customer entries to your system. Upon entering the Customer Management section you will be faced with a grid (seen above). The customer management grid will display all customers in your Virtual Ops system. These entries can be sorted by clicking the column titles, using the search function or filtering by additional options. For more information on Grid Sorting options click here.
Virtual Ops System Location/Navigation:
Customers > Customer Management
Grid Action buttons
New – Select this action to add a new customer.
Edit – Select a row on the grid and then this action button to view/edit an existing customer.
View Quotes – Use this action to view quotes for the selected customer. For more information on Quotes click here.
View PRs – Use this action to view Production Records for the selected customer. For more information on PRs (Production Records) click here.
View Orders – Use this action to view orders for the selected customer. For more information on Orders click here.
Ingredients Used – Use this action to view ingredients assigned to the selected customer. For more information on Ingredients click here
POs to Orders – Use this action to view POs and Orders for the selected customer.
Column Visibility – By selecting this option you can change the visible columns per the grid you are on. These selections are saved per user/browser per grid.
Excel – Selecting this action will export the currently displayed grid data to excel.
Add or Edit Customer
Adding and editing a customer will follow the same process as listed below. To add a customer click the “Add New” action button at the top of the grid. To edit an existing customer you will need to first select the customer from the grid by clicking their row, then click the “Edit” action button at the top of the grid. Both options will bring up the Customer Details window per the selected grid row. See example image below – click to enlarge. Begin the process by filling out all of the Customer Details input boxes at the top of the window and then click the “Save Details” button (1).
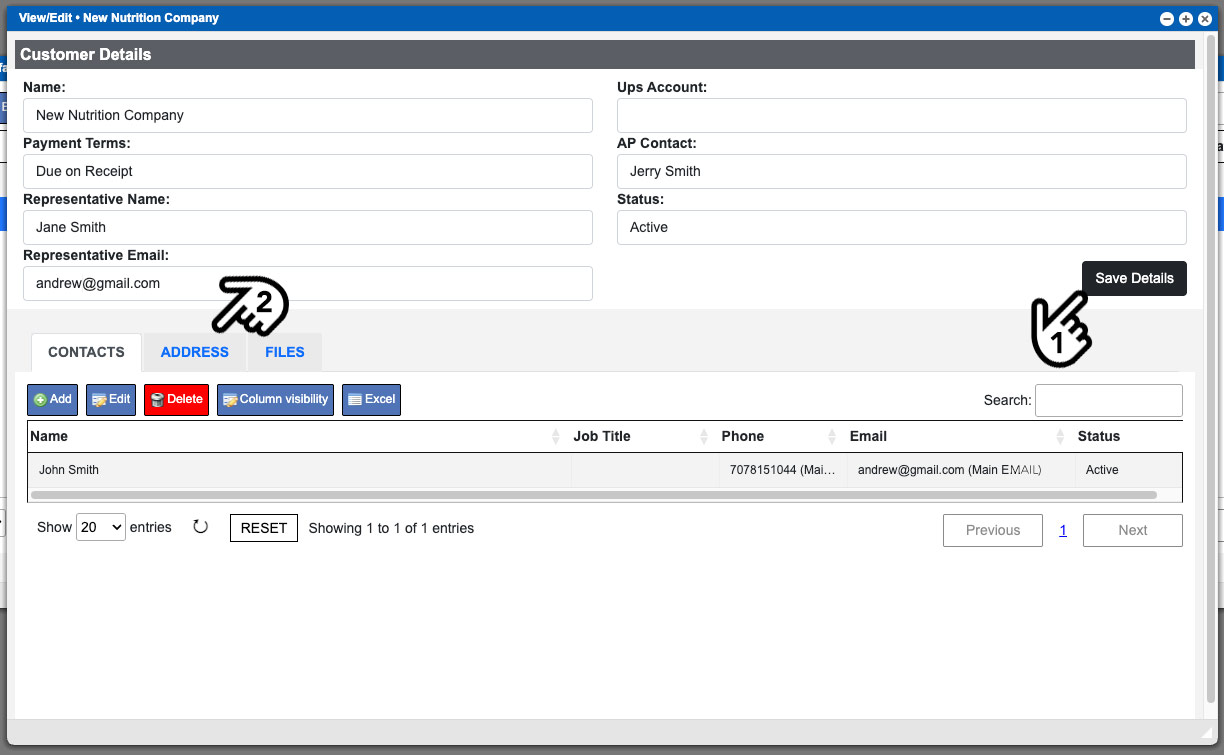
The bottom of this window contains tabbed sections for customer contacts, customer address and files (2). See example image above. Click the tab titles to access each individual section. Each of these sections will contain a grid to display and handle the entries. The Contacts tab is open by default. Click the “Add” button, above the contacts grid at the bottom of the window to create a customer contact. In the event you would like to edit an existing contact – you would first select the contact row by clicking it and then clicking the “Edit” button above the grid. Either action will bring up another window, the manage contact window. See example image below – click to enlarge.
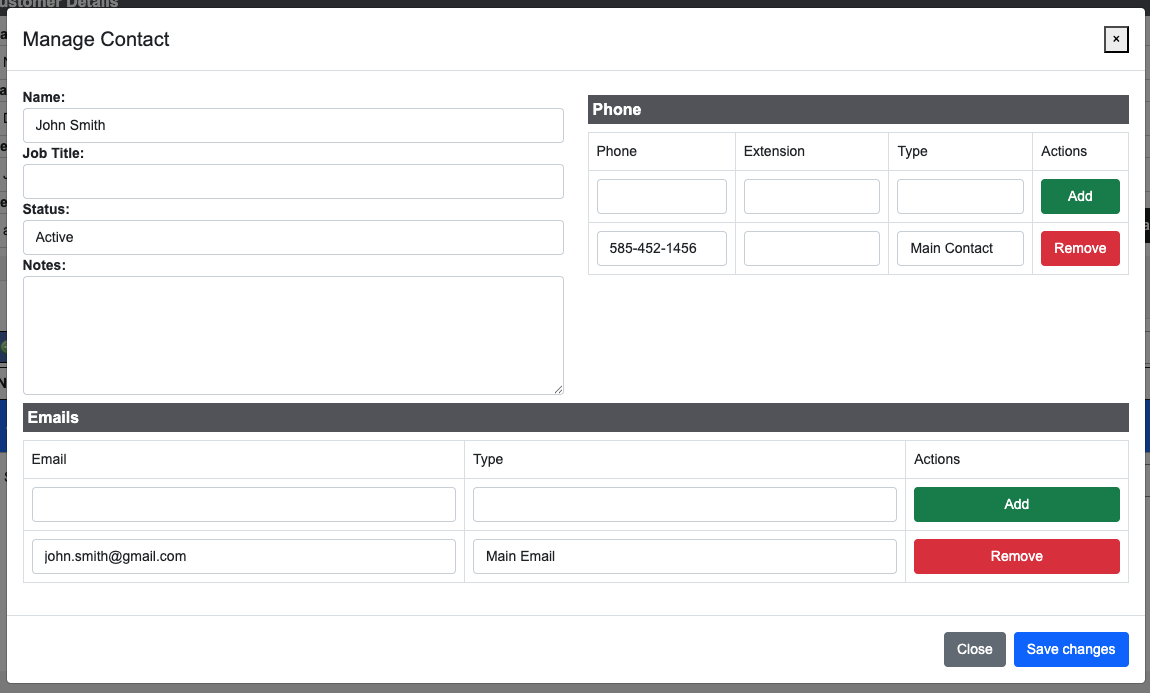
Enter the contacts name and job title, phone numbers and email addresses. When adding a phone or email entry you will need to click the green “Add” button after inputting the information. Doing so will then save the entry and allow you to enter in another entry if needed. In the example above you can see that an entry for both phone and email have already been added. Be sure to click the “Save changes” button at the bottom when this is completed. Adding an address is very similar in functionality.
