The Component POs grid will display all purchase orders per the selected component type. You can change the component type from the available filter dropdown above the grid. These entries can be sorted by clicking the column titles, using the search function or filtering by additional options. For more information on Grid Sorting click here.
Virtual Office System Location/Navigation:
Purchasing > Component POs > Select available component from dropdown
Grid Action Buttons
Add New – Selecting this action will add a new PO per the component type that you are viewing.
Edit – Select a row from the grid and click the Edit button to edit.
Email PO – Select a row from the grid and click the Email PO button to email a PO from the system.
Print – Select a row from the grid and click the Print button to download a printable PDF.
View Batches – Select a row from the grid and click the View Batches button to display all batches received under this PO.
Duplicate PO – Select a row from the grid and click the Duplicate button to duplicate a PO.
Confirm PO – Selecting this action will manually confirm that the vendor received your PO.
Column Visibility – By selecting this action you can change the visible columns per the grid you are on. These selections are saved per user/browser per grid.
Excel – Selecting this action will export the currently displayed grid data to excel.
Editing/Adding a PO
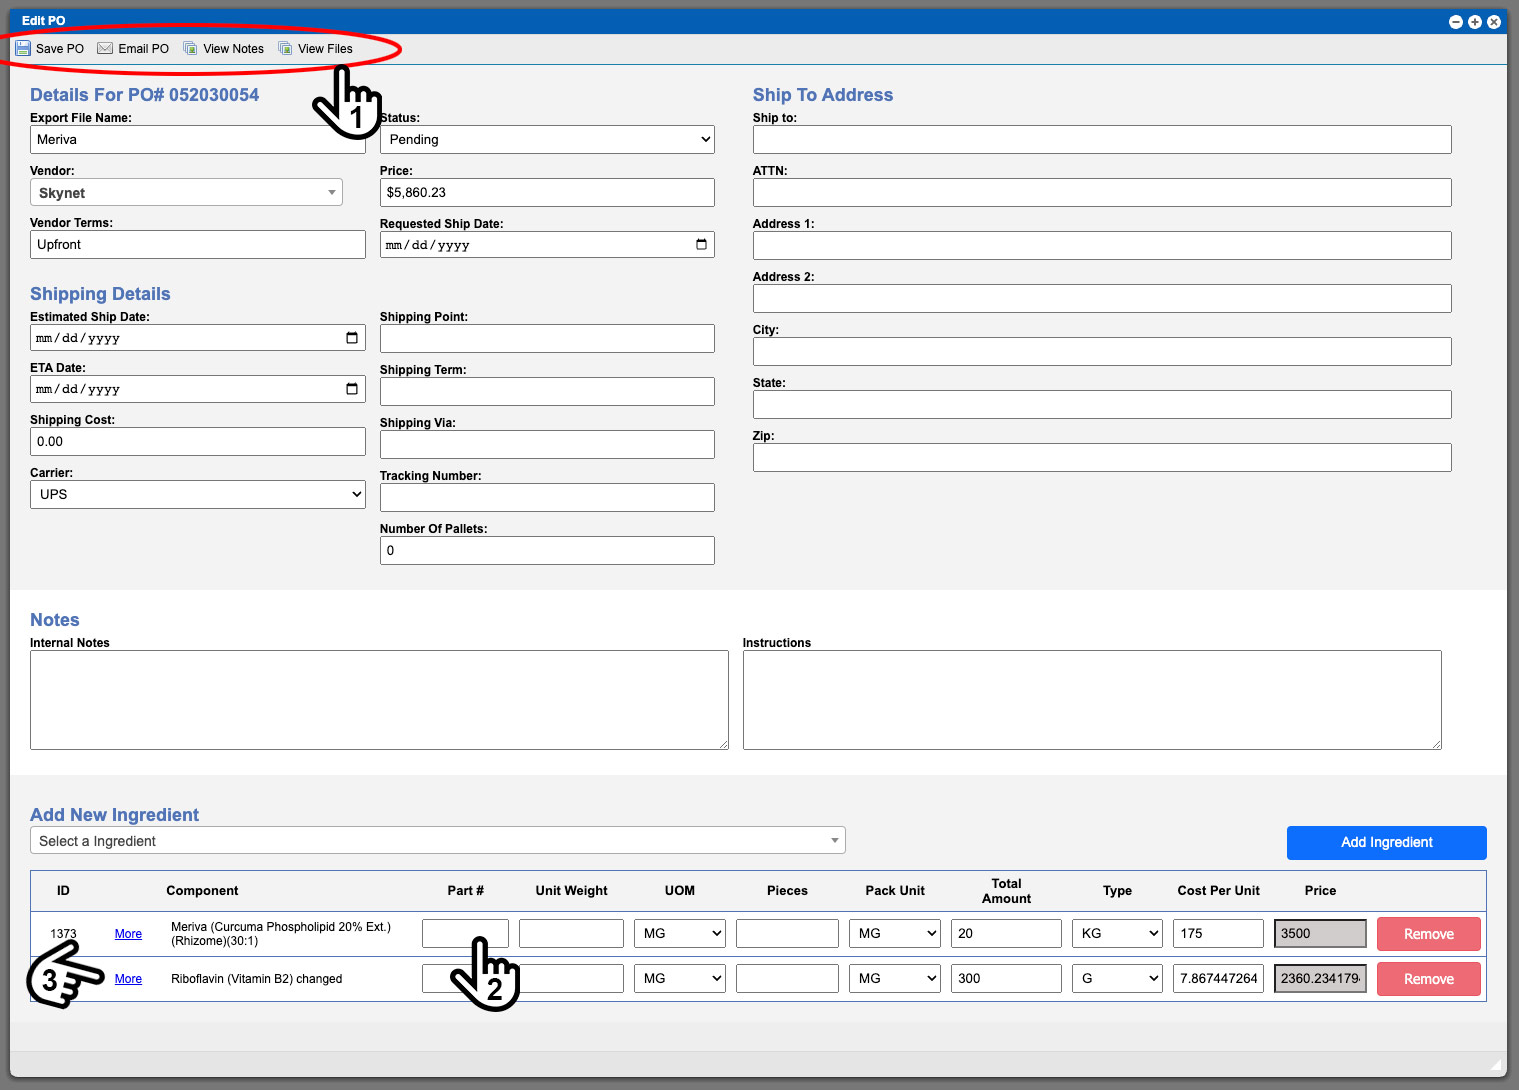
This action will bring up a new window where you can input or edit the details, add notes, files, and ingredients to your PO. There are four action buttons located at the top of the window (1). The buttons are self explanatory per the necessary added details. Please note that if you have not input information for the component part # (2) its column will not be present on the printed PO. See example image below. Click image to enlarge.
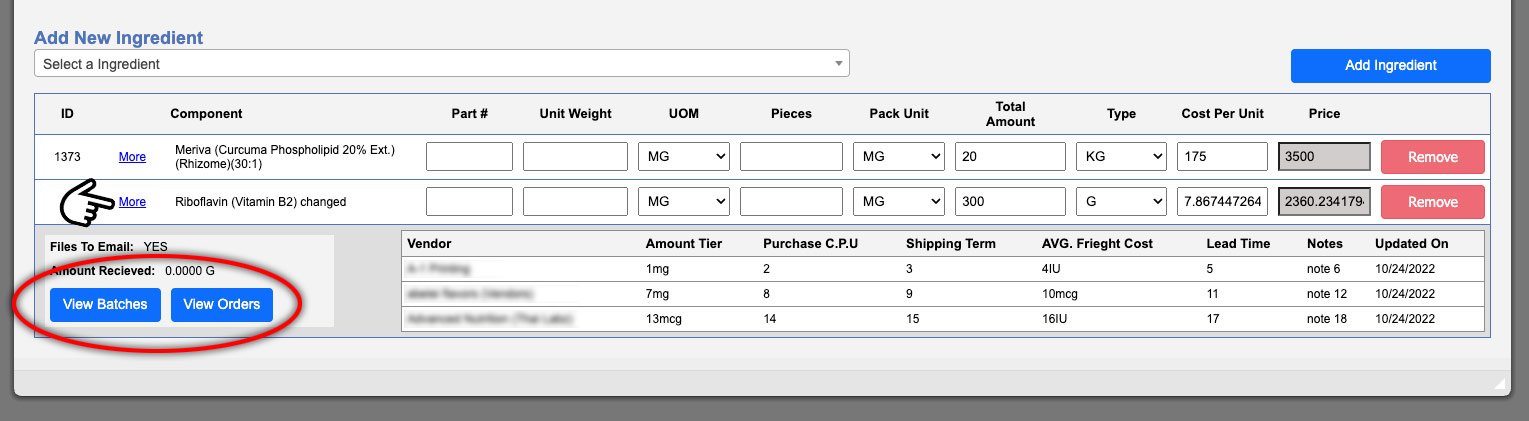
In the Add New (component) section at the bottom of this window you can view more details and access the batches or orders for this item by clicking the More link (3) at the far left side of the row. See example image below. Click image to enlarge.
Emailing PO
More information coming soon…
For more information on PO settings click here.