The Equipment page will allow you to setup equipment listings for all of your facilities equipment within the Virtual Ops system. These entries will contain information specific to the equipment like serial numbers, location, purchase dates or instruction manuals. This process is essential for allowing your equipment to utilize the Virtual Ops scheduling systems for maintenance, cleaning and production.
The basic workflow for this process is as such:
- Enter Equipment information into system.
- Create schedules (cleaning/maintenance) for equipment.
- Schedules will be completed and documented.
- Completed Schedules will need to be approved by a supervisor or QC manager.
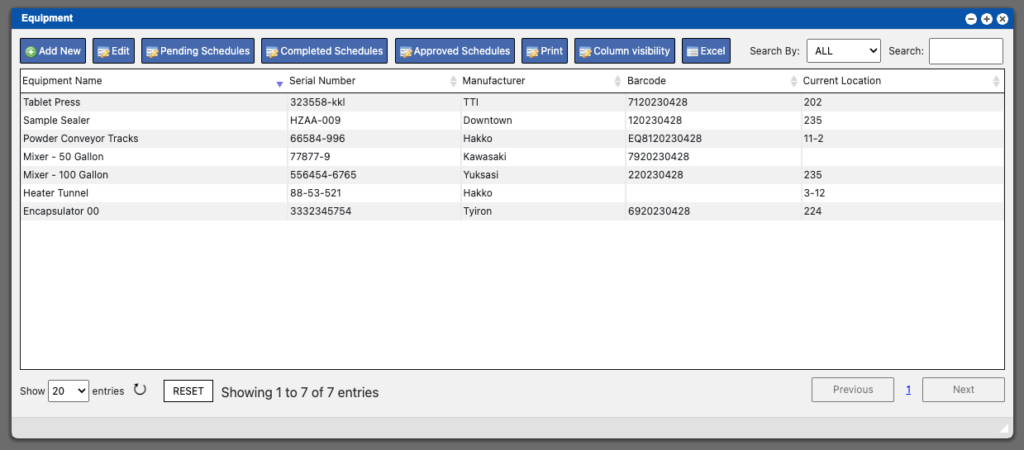
The Equipment page will display a grid that contains all entries for your facility equipment that have been added to the system. These entries can be sorted by clicking the column titles, using the search function or filtering by additional options. For more information on Grid Sorting click here.
Virtual Ops System Location/Navigation:
Maintenance > Equipment
Grid Action Buttons
Add New – Create new Equipment entry.
Edit – Edit an existing Equipment entry.
Pending Schedules – Opens a new grid that displays all of the pending Maintenance Schedules.
Completed Schedules – Opens new grid to display Schedules that have been completed but not approved.
Approved Schedules – Opens new grid to display Schedules that have been approved.
Print – Prints the selected equipment barcode.
Column visibility – Customize which columns are visible in the grid (preferences saved per user/browser).
Excel – Export current grid data to Excel.
Adding and Editing Equipment
To add equipment to the system start by clicking the “Add New” action button listed above the grid. This will bring up the equipment window. The top left of the window contains the basic Equipment Details. These inputs can be filled out manually. The Current Location input is a dropdown where you can select from existing locations in the system. Learn more about locations by clicking here. The Additional Information column, located at the top right of the window, can be used to input any name and value that might need to accompany the equipment and is not available in the equipment details column. You can add as many Additional Information lines as needed. When adding an Additional Information line name; previously added names from other types of equipment in the system are automatically loaded and can be selected from. This will allow you to quickly choose from names that have already been added to the system and can be applied to multiple pieces of equipment. Refer to screenshot below. Once your initial items are entered in you should click the green “Save” button located in the top right of the window.
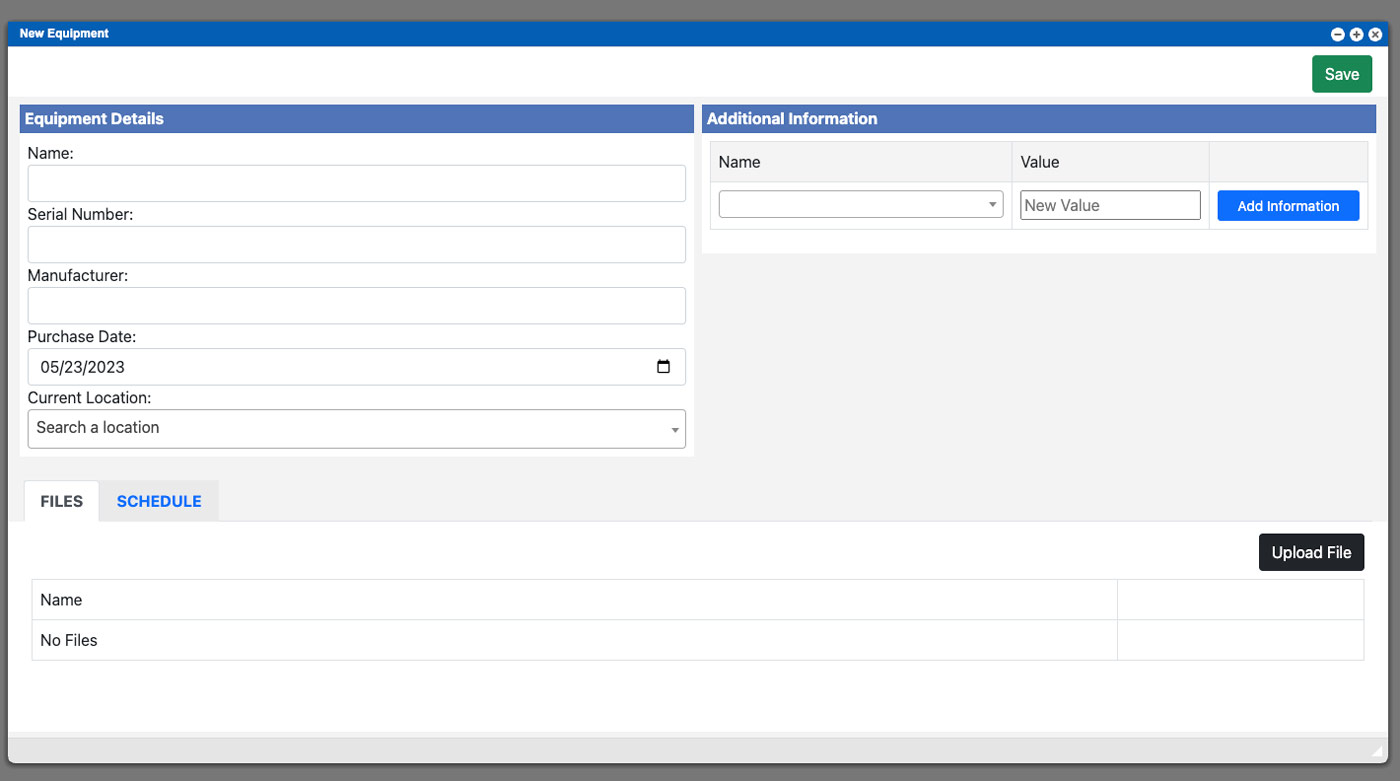
At the bottom of the new equipment window you will notice a Files and Schedule tab. Clicking either of these tabs will change the display to show the items within each section. Under the Files tab you can add files to equipment, like a service manual, by clicking the “Upload File” button and then navigating to your files. When selecting the Schedule tab another grid will be displayed. This grid shares all of the same functionality seen in other grids in the system. Click the “Add New” button above the Schedule grid to create a new Schedule for this equipment. See screenshot image below.
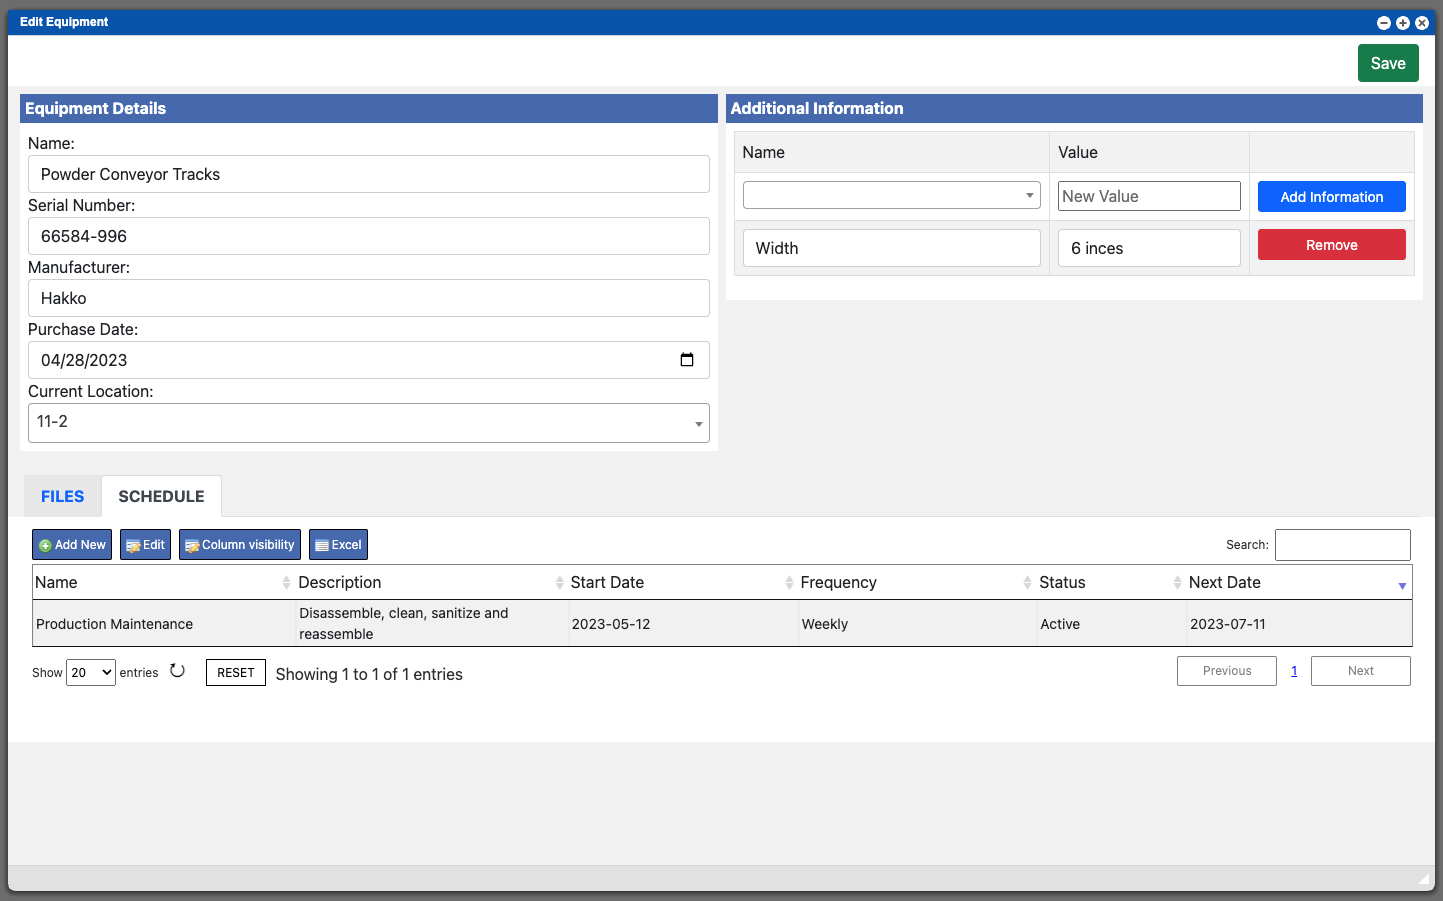
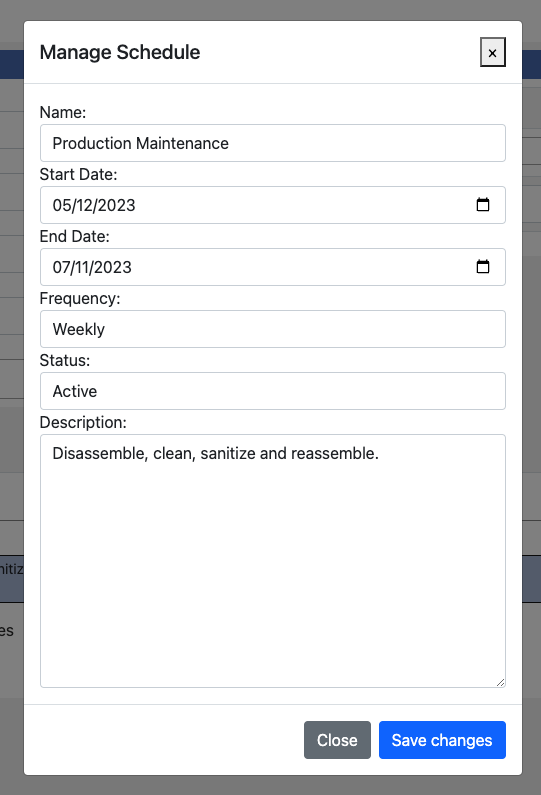
To edit an existing schedule, select a schedule from the grid by clicking the row (it will highlight) and then click the “Edit” button above the Schedule grid. This will bring up the Schedule window where you can create/edit the information. See screenshot reference image below. You will only need to create a Schedule one time. Depending on the Frequency setting it will automatically generate. The available Frequency settings are: Bi-Yearly, Daily, First of Month, Monthly, Once, Unscheduled, Weekly, Yearly.
Other Helpful Links.
