Storage Racks should be setup in the initial onboarding process but can also be set up later or when new warehouses or storage racks are added. The Storage racks functionality can allow you to quickly setup a warehouse racking system for any application. Locations for each rack will automatically be created and edited here:
Virtual Office System Location/Navigation:
Administration> Configuration > Storage Racks
When setting up the racking system you will select the warehouse you wish to set up first. Once the warehouse is selected you will choose the naming sequence for the rack, column and rows. Doing this action will determine how the locations generated will be created and once you save the initial setup you cannot change the naming sequence.
Let’s begin the process for creating storage racks in your VO system; start by selecting a warehouse (1). Next, use the drop-down menus to define the naming conventions for racks, columns, and rows (2). You will then need to enter the total number of racks in the warehouse (3), followed by the largest Columns (4) and largest Rows (5). See example image below – click to enlarge.
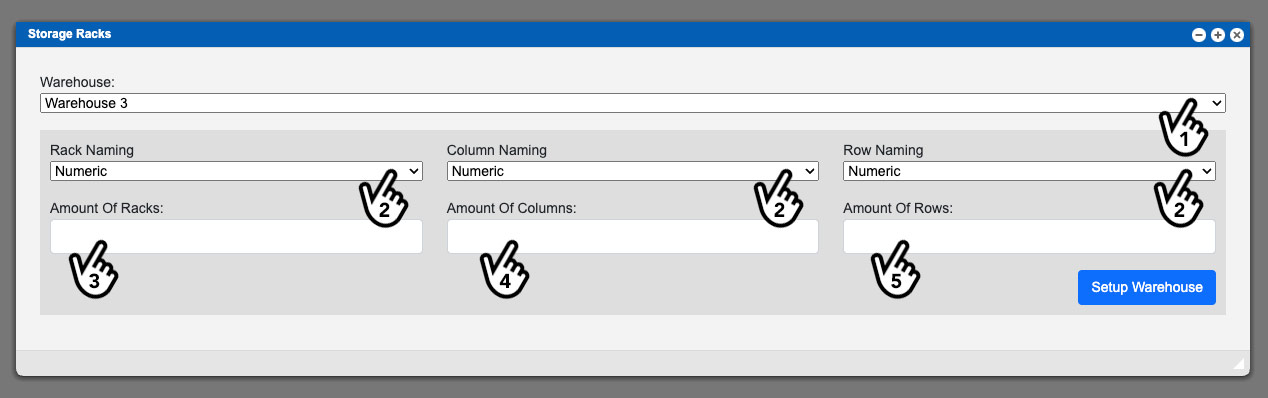
If you choose numeric as a naming convention, then all locations will be represented by a number. If you choose alpha as the naming convention, then all locations will be represented by a letter. If the rack, row or column marked as alpha exceeds twenty-six then the letter will be doubled. For example, a warehouse with twenty-seven racks that has been chosen to be setup as an alpha will start with the letter A but the twenty seventh rack will start with AA.
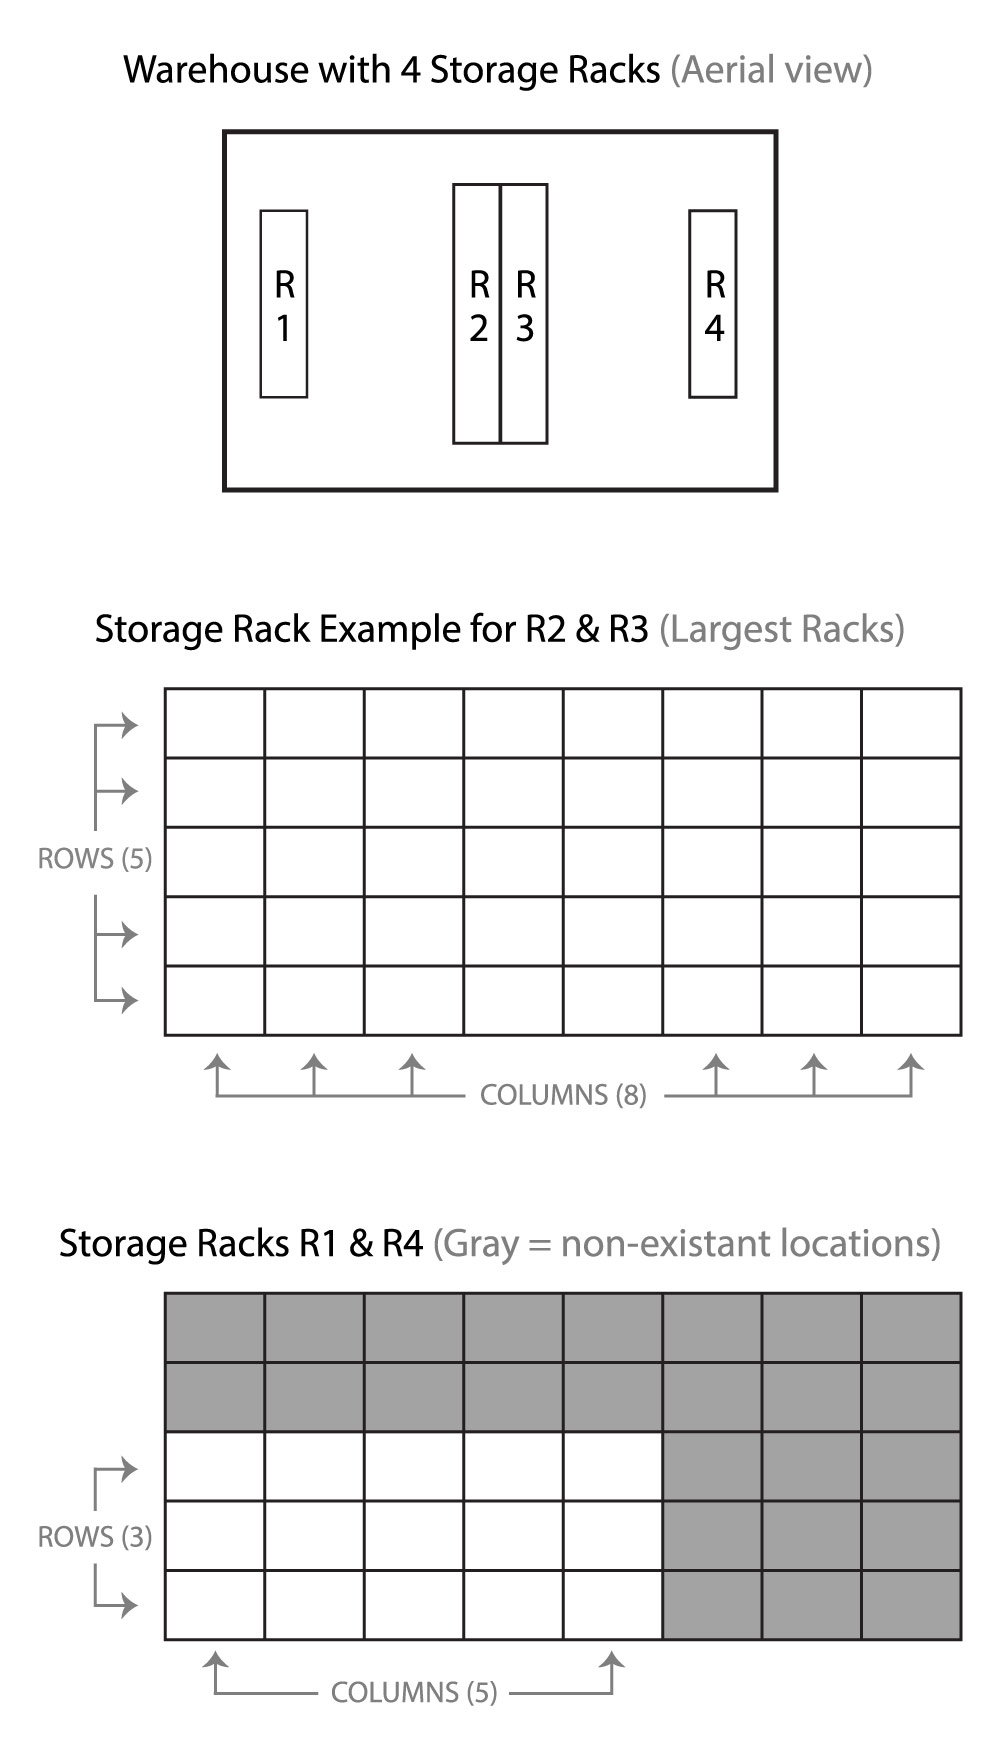
Insert the amount of Racks in this warehouse into the “Amount of Racks” input. When configuring your racks in this warehouse, base your Column and Rows inputs on the largest rack in the warehouse. For example, if the largest rack is 5 rows high and 8 columns wide, then you would enter 5 into the “Amount of Rows” field and 8 into the “Amount of Columns” field. This may generate some non-existent locations, but that is expected and not an issue.
Once you have setup the initial warehouse the system will then generate the individual locations needed for each rack, column and row in the warehouse.
A visual example of a warehouse setup with 4 racks and using the information above can be seen below.
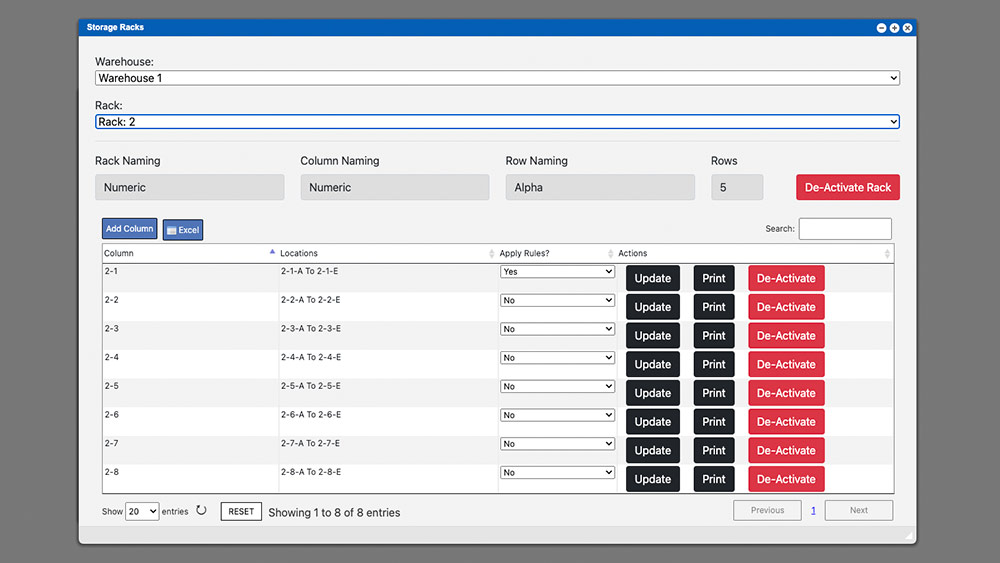
A VO system screen example of a warehouse setup with multiple racks and rows marked as alpha and the columns marked as numeric can be seen at the very top of this page.
Once the warehouse has been setup you can print the individual racks by the column. First select a warehouse. A list of racks will be presented. Choose a rack. Once a rack is chosen a table will load showing the columns in the selected rack. From the table below you can turn on/off rules, print the locations or deactivate the column. Deactivating the column will mark all the locations in that column inactive. You can also add an additional column to the rack separate from the other racks. The system will automatically generate the column and corresponding locations for the new columns. See example image at the top of this page.
Apply Rules?
Rules allow a column to interact with ingredient containers that have allergens. Special rules will be applied to ingredient containers that have allergens. When rules are turned on for a column the following rules will apply.
- An ingredient with an allergen cannot be placed above or below another allergen without having the same allergen. For example, a peanut allergen cannot be placed above or below a wheat allergen.
- If an ingredient has two allergens, then you can place another ingredient with one of the same allergens above it. For example, one ingredient has wheat and peanuts, and another has only peanuts. The peanut ingredient can be placed above the wheat/peanut ingredient.
- If an ingredient has an allergen and no containers above and below have allergens or the containers above and below have the same allergen, then the system will allow you to move the container into the location.
Once rules are turned on for a column current inventory in the column will not be affected. Only once a container is being moved into the column via the scanner will the system check to see if it can be moved.