This troubleshooting section is intended to provide an online resource of common issues that you may encounter while using the Android scanner. We will adding new items to this page as they come up and in the event you facing an issue that is not listed here please call or email us for assistance. A list of common error messages and or situations will be listed at the top of this page. Click the item that most closely matches you situation and you will be dropped down to that section. If you are having problems with Virtual Office – see our troubleshooting page here.
“Wi-Fi can’t connect – No internet access”
Wi-Fi can’t connect – No internet access
If you are confronted with this message while using your Android Scanner please follow these steps.
- Restart Phone – Press and hold the scanner device’s power button until further options are presented. Tap on the Power Off or Restart menu option.
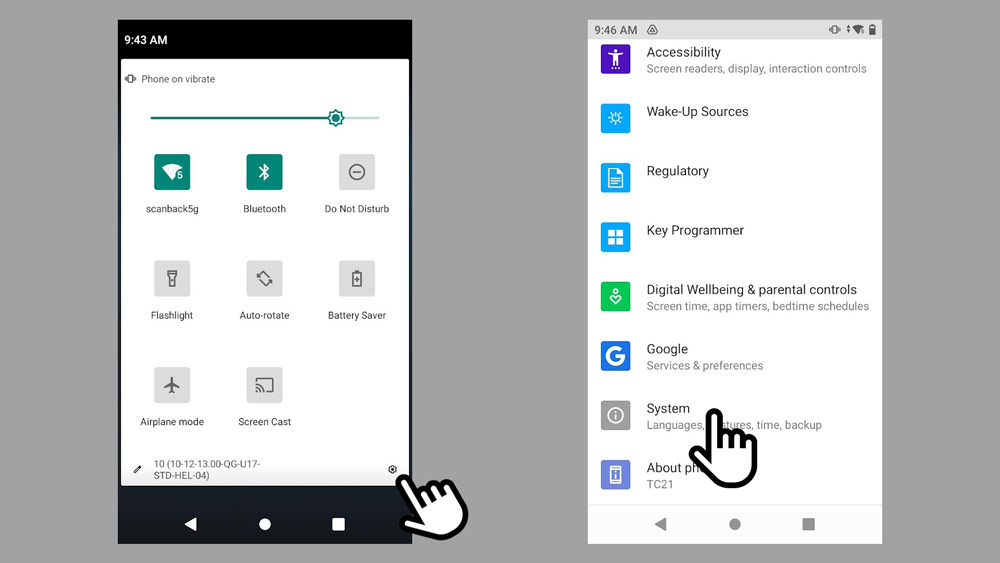
- Reset Wi-Fi – Swipe down from the top of the Android Scanner screen. Tap the Wi-Fi icon to turn it off and then back on again. This is located at the top left in our example image below.
- Reset Settings – Swipe down from the top of the Android Scanner screen; this will take two don swipe actions in order to access the full menu. Tap on the small gear in the bottom corner. See example image below. Then scroll down the options and select the “System” menu option (example below) and then select “Reset Options” and then again on the “Reset Wi-Fi & Bluetooth. Confirm by tapping the “Reset Settings” button at the bottom of the screen to complete the process.


