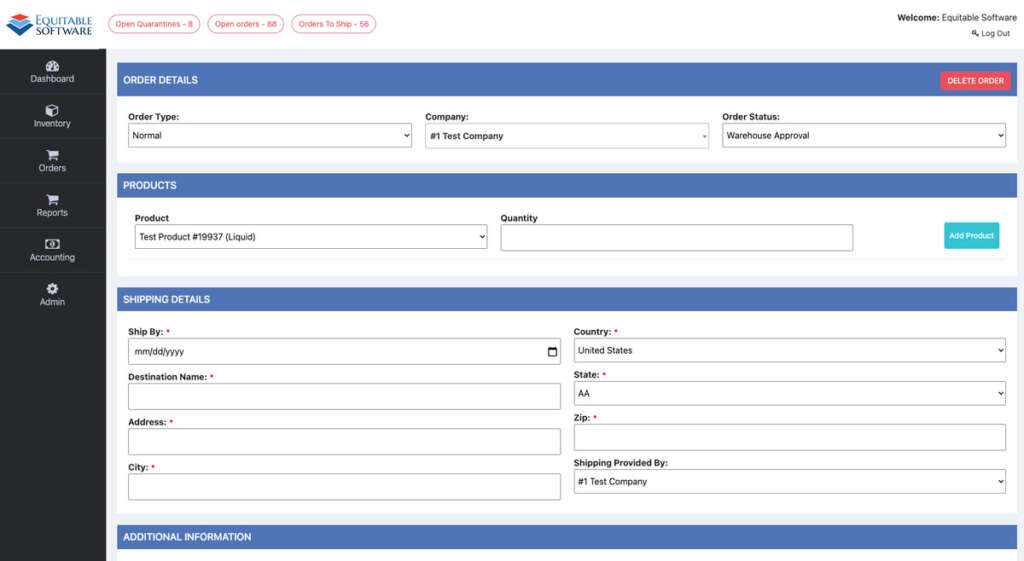
This page/form is the main structure for any order and will also be seen when editing an order. We will go over each section starting with the top.
Quick Links:
Deleting An Order
When a order is deleted all inventory assigned from a pallet is put back into the system and all products added to the order are removed. If the company that the order is for is marked as Bill On Shipment and the order has been shipped the system will not remove the billing entry that was added at the time the order was shipped. Due to the billing not being removed after an order has shipped you will need to notify the billing department that the order has been deleted. Only system administrators can delete an order after it has been shipped.
Order Details Section
When setting up an order the first dropdown for Order Type should be set to normal. If you are creating an order to transfer items to another internal section, bin or warehouse then you would select CrossDock. Next you will need to select a company from the dropdown which will change the available products. Order status dropdown will populate with available statuses based on the current status of the order. Possible statuses are:
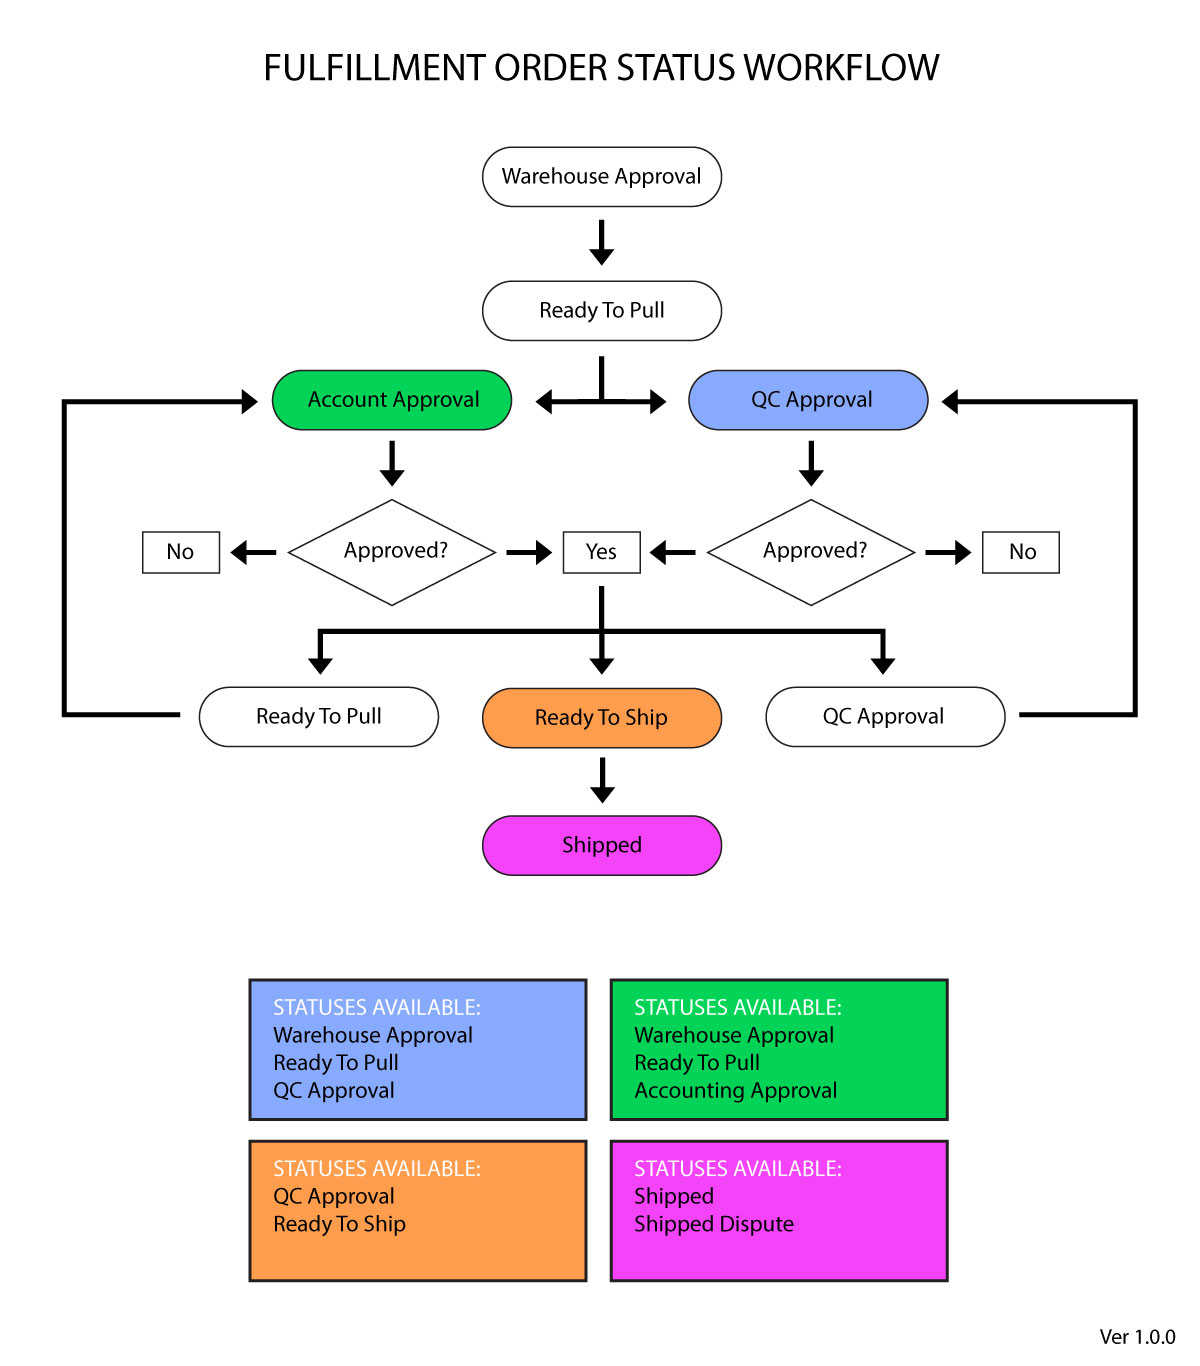
Warehouse approval – Waiting for warehouse to check inventory and approve order
Ready to pull- Warehouse approved order that is ready to pull inventory for order
Accounting Approval- If company is on Credit Hold, accounting will need to approve order before fulfilling
QC Approval- Inventory has been pulled for the order prepared to be shipped. Final checks are made before shipment to ensure that all products and order details are correct.
Ready to ship- Order is ready to ship
Shipped – Order has been shipped
Shipped Dispute- There is an issue with the customer receiving shipment with this order. I.e. Pallets became unwrapped or damaged.
A graphical representation of the status workflow can be seen below:
Products Section
The product dropdown (in the products section on the orders page) is populated with the products within a selected company. Select a product to add to the order and input the quantity in the following input box. When completed you can add the product to the order by clicking the Add Product button located at the furthest right section of the row.

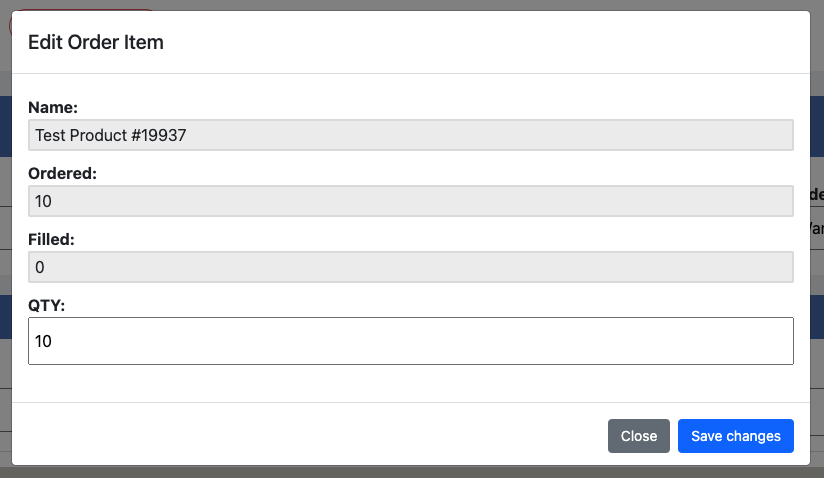
Once added, seen above, the products will show up in a list within the products section of the page. You can click the Edit button for any added product to then change the quantity. This action will take place in a pop-up window seen below.
In order to add inventory to a product or to remove a product from the list, click the product title or title bar. This will expand the product and allow you to view and add inventory from available pallets. Image below.
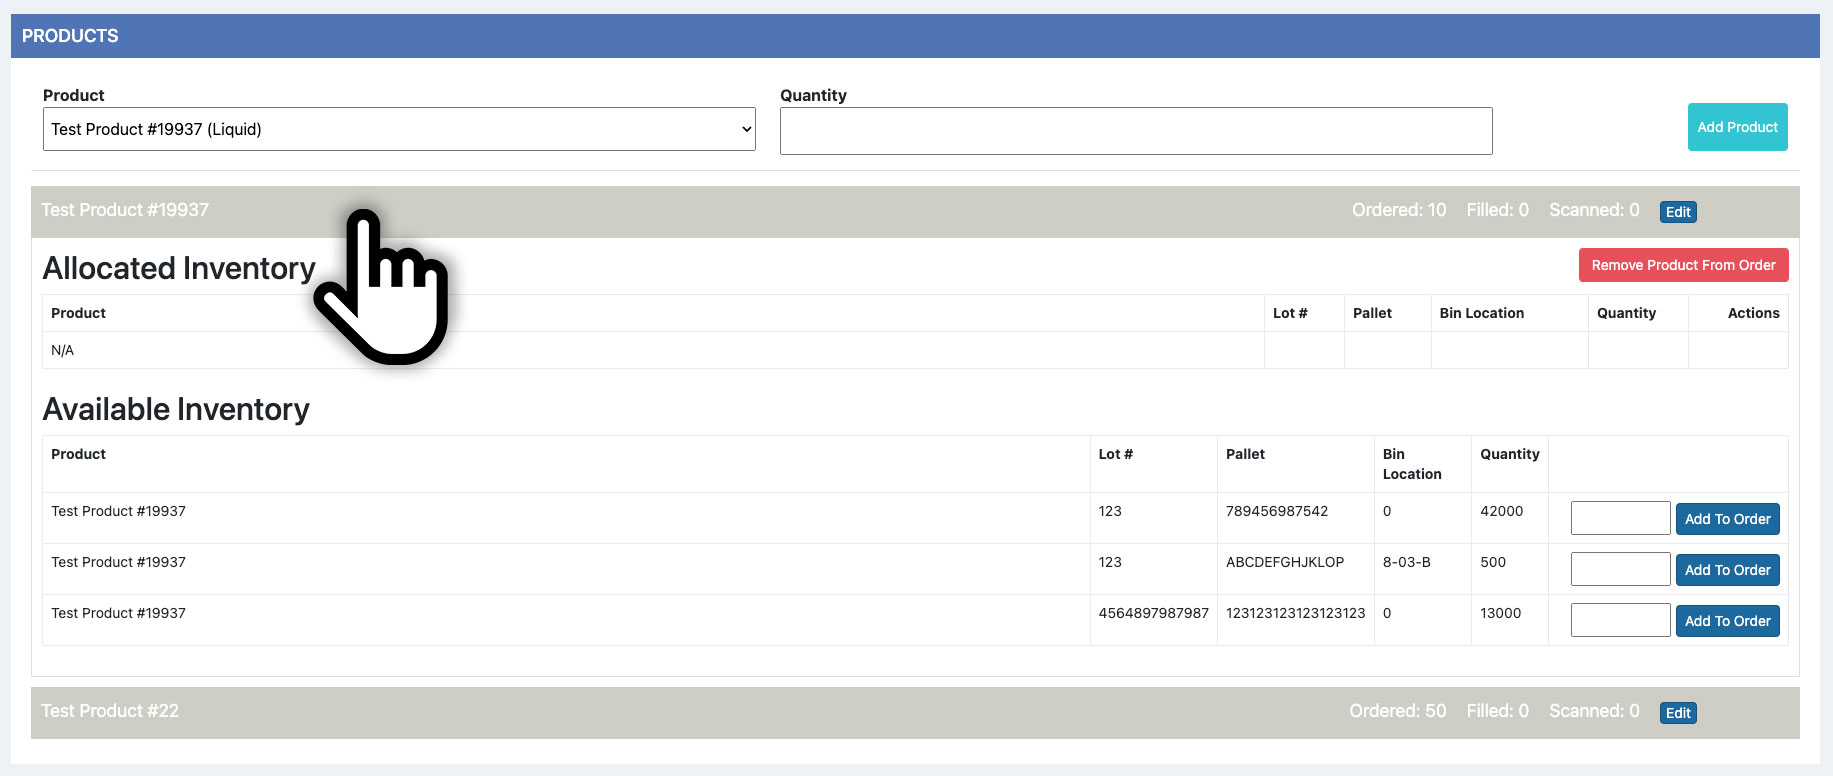
Input the desired product inventory quantity from available pallets and click the Add To Order button on that products row. The inventory will be added to the order and reflected in the title bar information. If the order is not filled, the title bar will act like a status indicator and turn yellow.
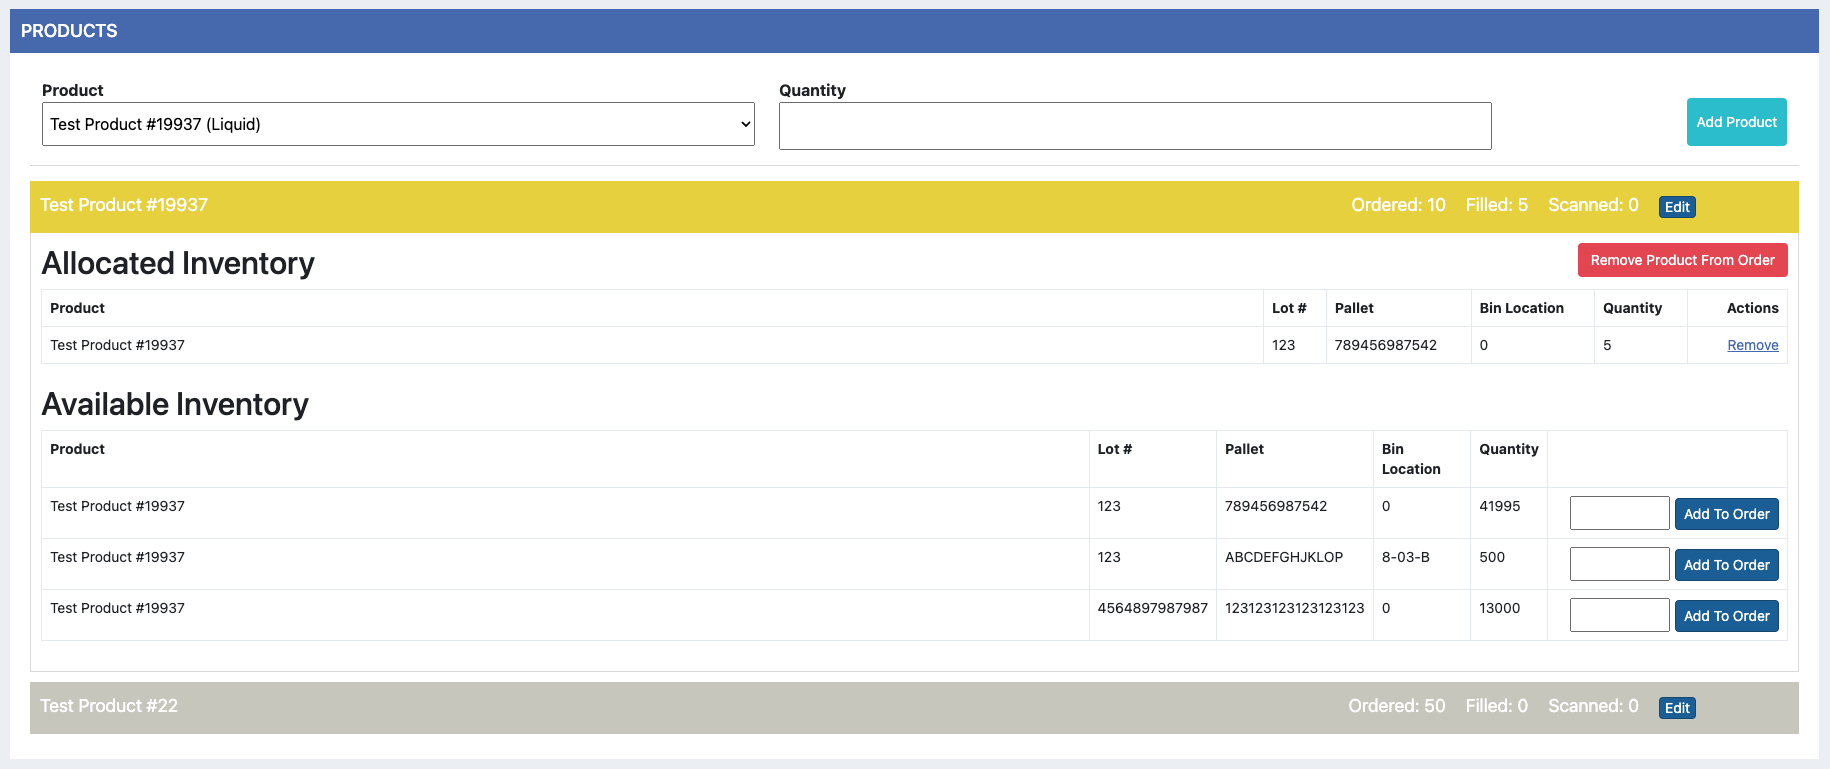
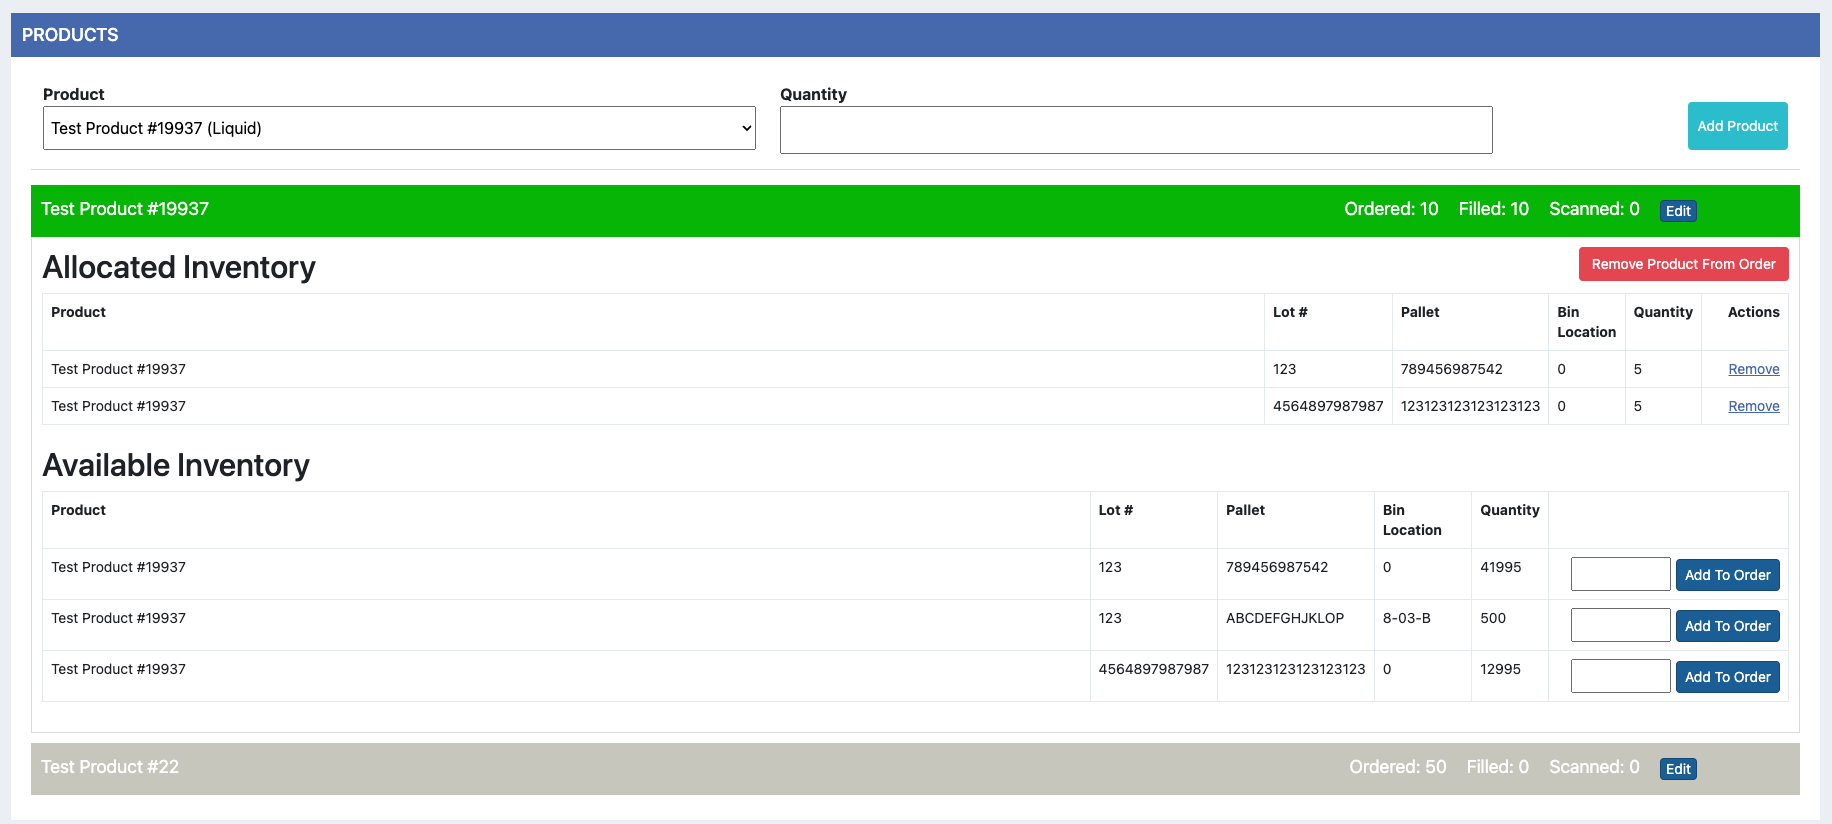
In the image above you can see how a quantity of 5 was added from pallet 789xxx. This updated the Filled info to 5 and the title bar turned yellow to indicate that the order has not been filled. I added 5 more quantity from pallet 123xxx which filled the order and turned the title bar green. Seen below.
Additional Information and Shipping
Once the order has been filled it will need to be approved by Accounting and or QC in order to be shipped. Files can be added to the order at anytime during the process. This can be accomplished in the files section near the bottom of the page. After approval you can ship the order. For more information on Orders To Ship click here.
Before or after the order has been shipped you can edit the shipping details under the Additional Information section.

