The Finished Goods Tests section allows you to edit and or create new Lab Test procedures and requests for your system. If you are needing to add and or create Lab Testing or special charges for specific testing on ordered or finished goods then creating Lab Tests is what you are looking for. Special Charges for Lab Tests are often added to orders or finished goods; for more information on adding special charges and lab tests click here.
Virtual Ops System Location/Navigation:
Administration > Configuration > Finished Goods Tests
The process of creating a Special Charge or Lab Test essentially involves building parameters for a lab test and then creating a form, using our sections, to create inputs that can attain all of the needed information for said Lab Test. Once the initial tests and sections are created in the system they can be edited and or applied to future occurrences. All of this can be accomplished within the Virtual Ops system.
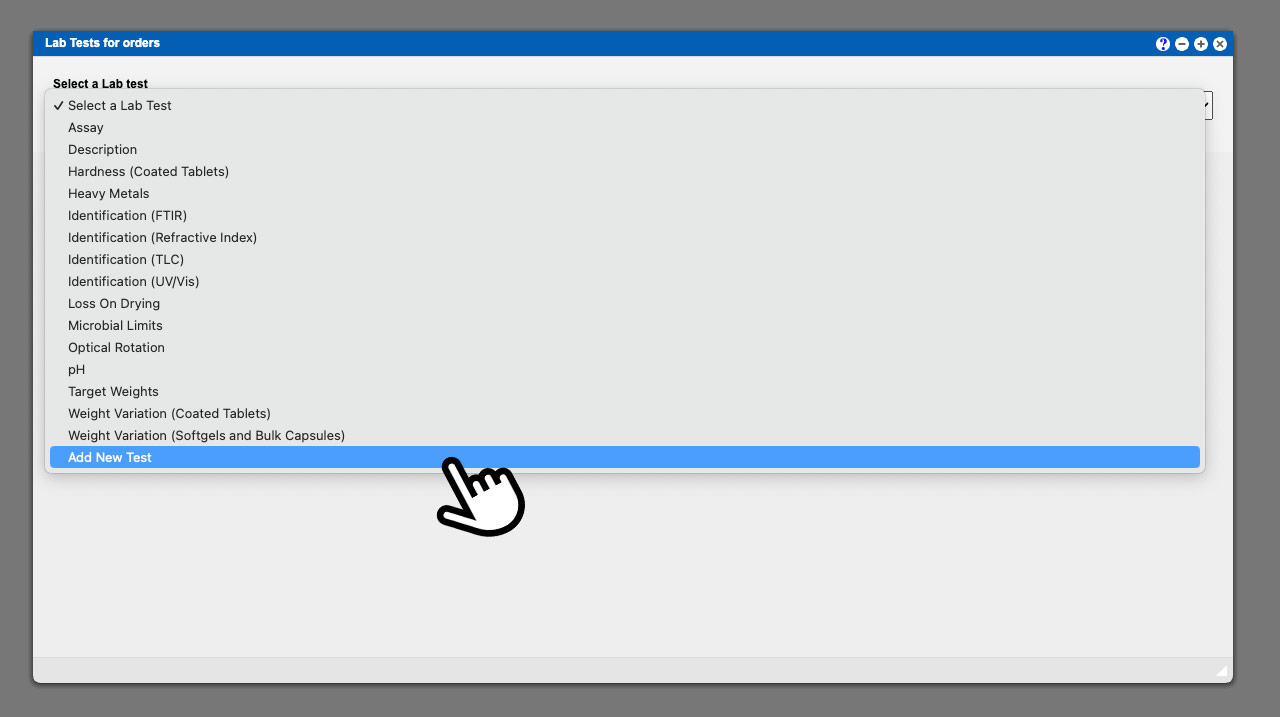
Once the window has opened click the dropdown bar to view and select an existing Lab Test to edit. To create a new Lab Test select the “Add New Test” option from the list. See example image below. Click to enlarge.
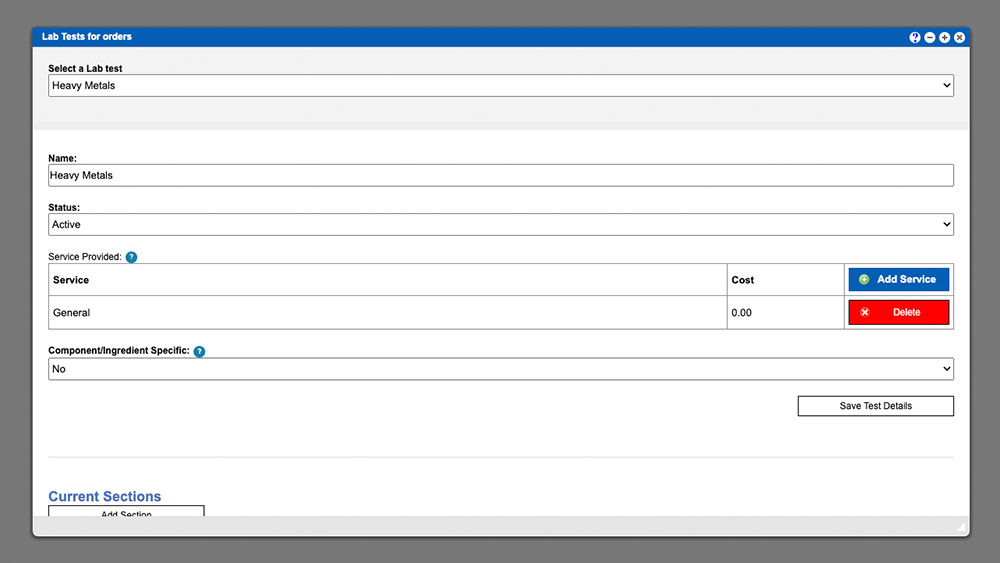
Enter your Lab Test name, set the Status and the Add Services to your lab test. To add service to your lab test click the blue “Add Service” button (1). To add a service name, click the input (2) area and it will allow you to add a name. To add a cost, click the input area (3) and it will allow you to add a cost. You can add or delete as many services or tiers to your lab test as needed. Click the “Save Test Details” button (4) at the bottom to complete this initial setup process.
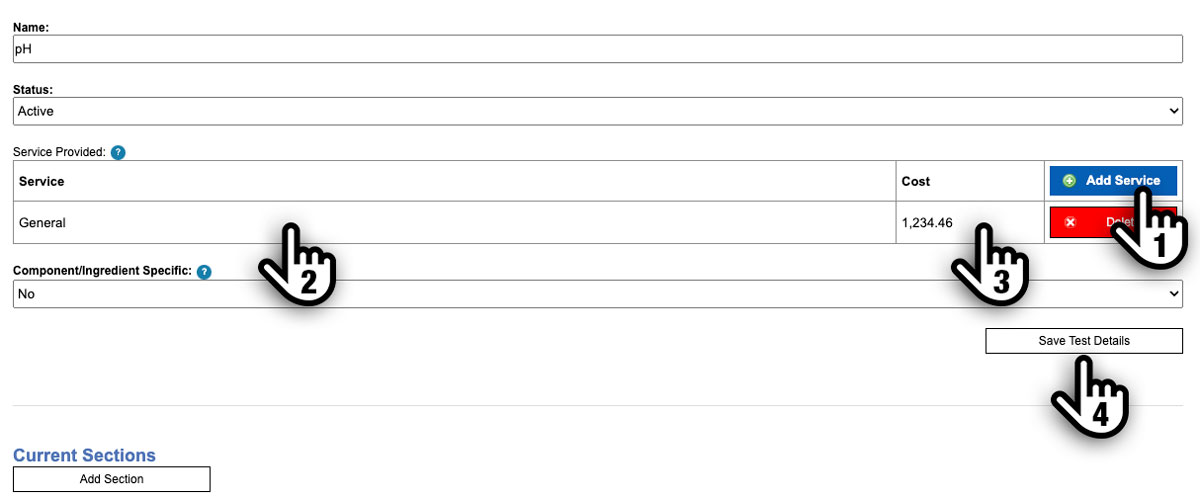
Next you will need to a section where the Lab Tests can be implemented. Multiple sections can be created and will be listed in this area. To begin click the “Add Section” button under Current Sections at the bottom of the window.
Adding Sections to Lab Tests
Now that the service information is complete we need to create the sections. Experimenting with the options and building test section will greatly help your learning curve but I will provide a basic overview and example. The sections will provide input fields for specific information. These input fields can be customized to accommodate the information and labeled per your discretion.
To begin click the “Add Section” button. We are going to make our initial section for our Hard Metals Lab Test. This test will require several sections and fields in order to record all of the data. This first example section will need several field input types in order to capture all of the data. For this Section Label (1) and Section Display Name (2) we will input “Limits”. Refer to the image below. Click image to enlarge.
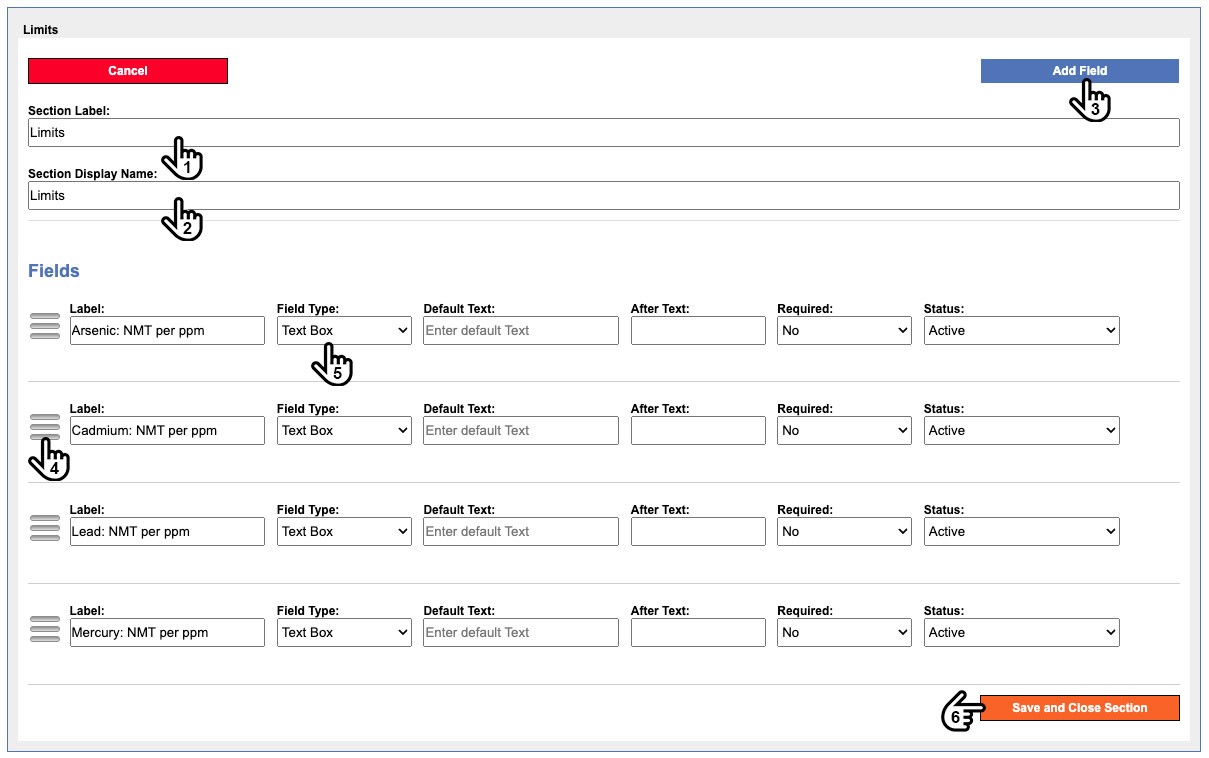
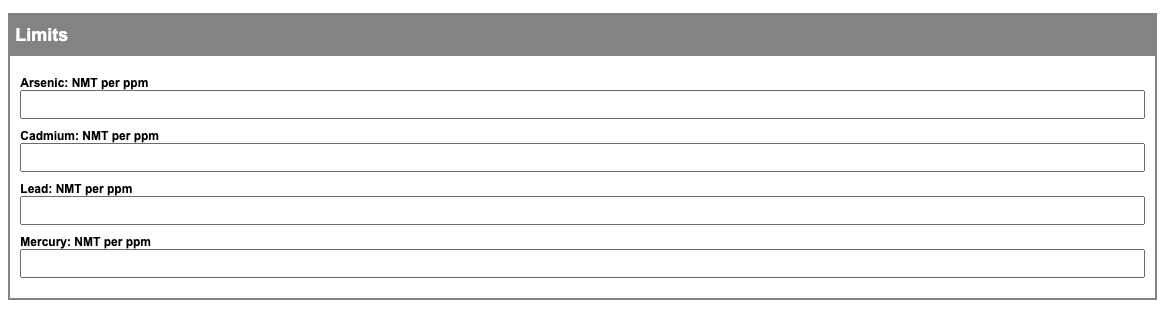
By default one field is added but you can add more by clicking the “Add Field” button (3) in the top right. You can re-order the fields by click and dragging the 3 bar icon (4) to the left of the first label input box. For our example lets begin with the label as “Arsenic NMT per ppm”, the Field type (5) will be a text box, it is set to not be required and the status is set to Active. It is important to note that the input to the right of the Field Type dropdown will dynamically change title depending on the selection made in the Field Type dropdown. We created the remaining needed Fields for our Heavy Metal Lab Test section containing our “Limits”. Here is an example of what the test looks like when applied to an order. See image below. Click to enlarge image.
Field Options and Description:
Section Label: Internal naming convention
Section Display Name: External naming convention
Label: Placeholder or title text for field(s)
Table – Displays a table with multiple input areas depending on rows/columns.
Default Text (only used with text box types): This text will be displayed as a default. Could be used as placeholder text that can be changed on an order.
Options (only used with drop down types): Enter all options that are to be displayed in your drop down separated by commas.
Columns, Rows (only used with Table type): Enter a numerical value for the amount of columns and rows separated by a comma.
After Text: This text will be displayed at the end of the input area. This text cannot be edited on an order.
Required: Select yes or no to require the input to have a value input before saving.
Active: Selecting this status will allow the field to be displayed.
In-Active: Select this status to set the field to NOT display.
Remove Field: Select this status to remove the field.
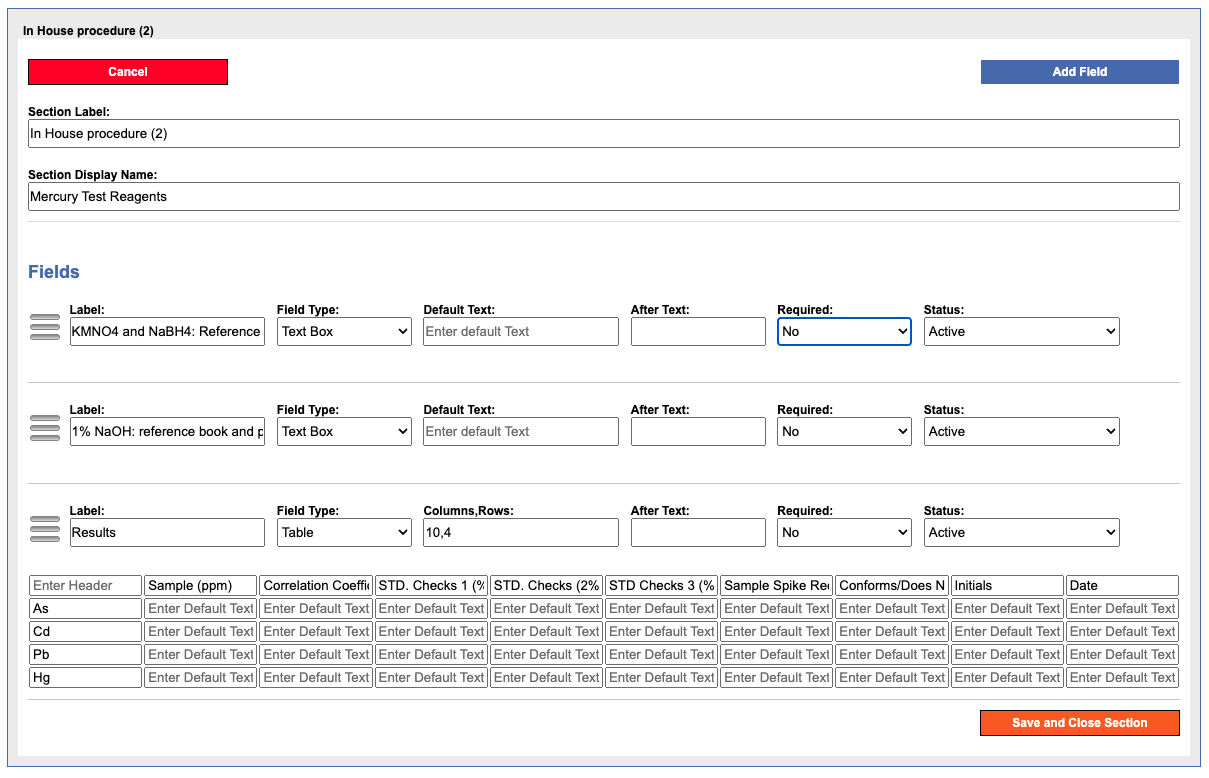
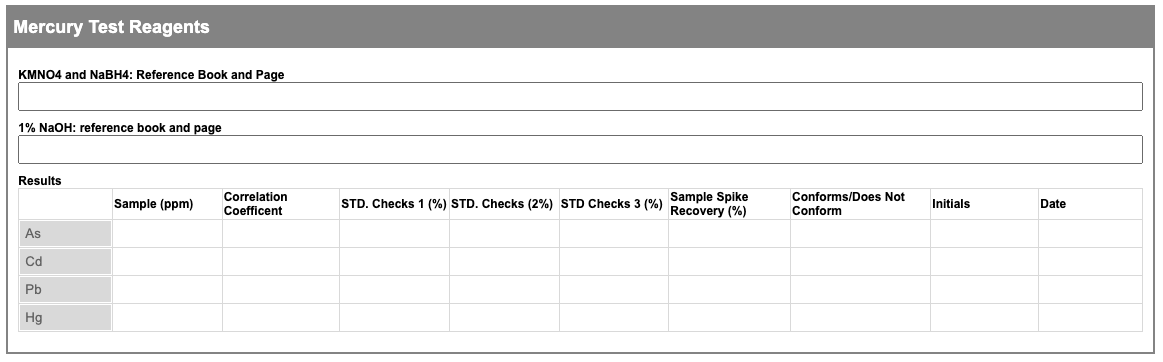
Additional Field Examples
The image(s) below depict a section that uses both text fields and a table field. The first image give you an idea of how this section was constructed. The second image will show you what the end result for the lab test section looks like when applied in the system. Example images below. Click images to enlarge.