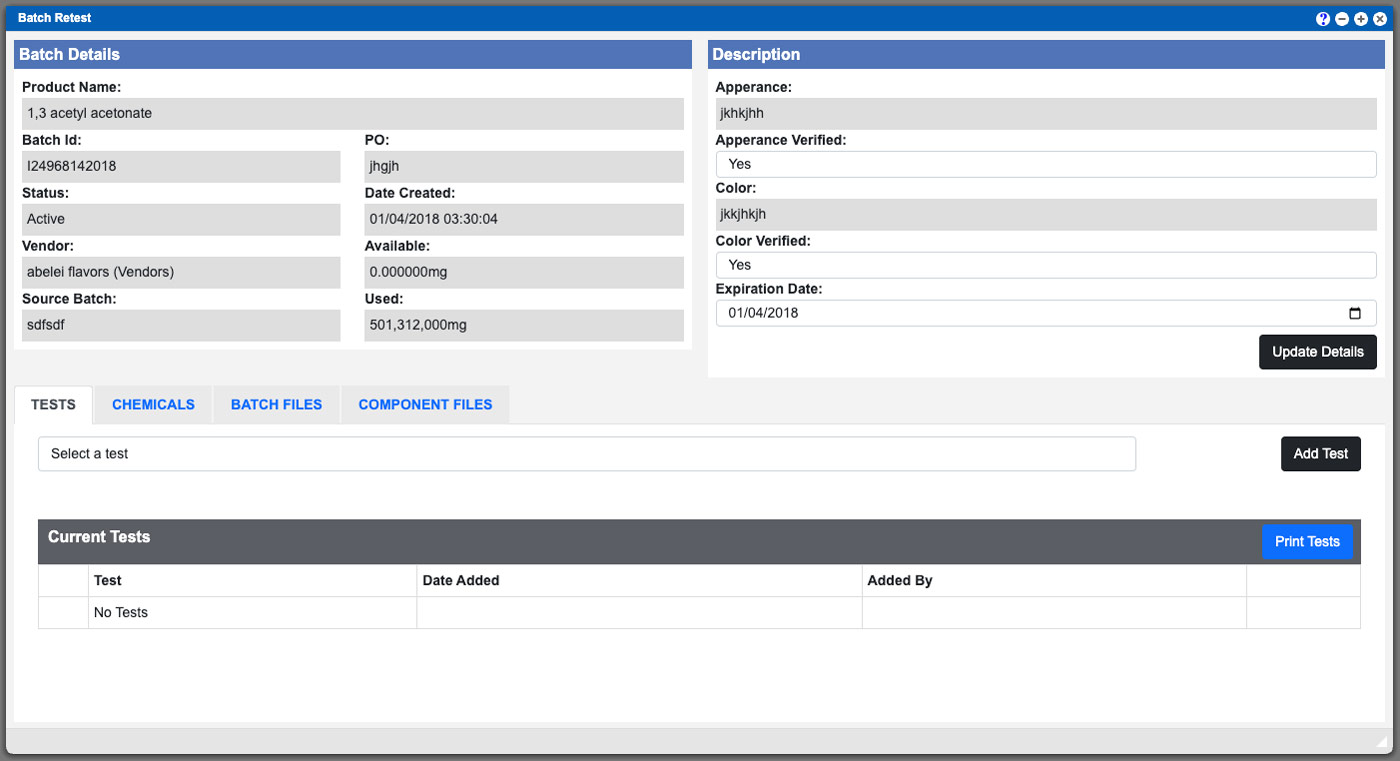
You begin the Batch Retest process by entering in a Batch ID and then clicking the “Load Tests” button located in the bottom right of the window. See example image above. The next window will pull up detailed information about the Batch Retest. You can modify the Appearance Verified, Color Verified and Expiration Date fields located in the top left portion of the window. If any of these items are modified then you will need to click the “Update Batch Details” button. See example image below (click/tap to enlarge).
Virtual Office System Location/Navigation:
Inventory Batches > Batch Retest
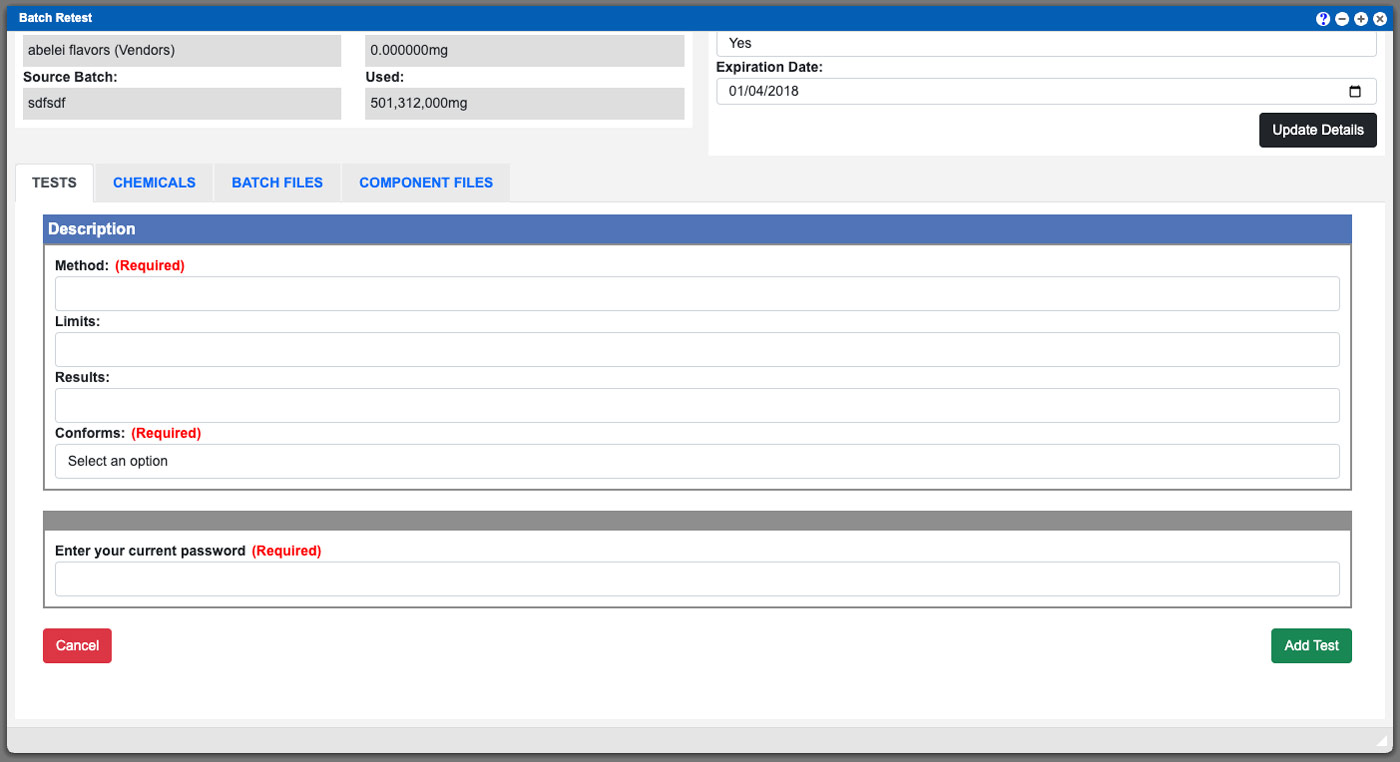
You can add additional test types in the bottom portion of the window. Once a test type has been selected to be added you will need to fill out the available input boxes; some of inputs are required. Enter your Virtual Office user password and then click the “Add Test” button located at the bottom right corner to complete this process. See example image below (click/tap to enlarge).


